-
Core Data Best Practices
As your app gains more customers and becomes more feature-rich, you may find yourself with new problems to solve. Core Data is a powerful tool that has changed a lot over the years. Learn about the new best practices in Core Data, such as how to use concurrency and persistent history, and discover how to test for, and resolve, common problems using familiar technologies.
Resources
-
Search this video…
Good afternoon, everyone. Welcome to Core Data Best Practices. My name is Scott Perry. I work on Core Data. And we'll be joined later by my teammate, Nick Gillett.
The plan for today, first, we'll talk a bit about how the process of getting started with Core Data has evolved over time. Then, we will cover ways we can evolve our application more easily by taking advantage of extension points in the persistent container. We'll follow that with how we can evolve our model as our apps requirements change and our data grows.
Then, Nick is going to talk about a few ways our app can maintain its performance, even as it scales beyond our wildest dreams, and we'll wrap up with some good stuff about transformers, debugging, and testing. But first, let's build an app. I like to take photos, so we're going to build something that allows me to share photos with friends and get comments from them, even if it's just Nick asking how my slides are going.
Where should we keep our app's data? Well, we could keep it all online, but I usually take photos when I'm traveling, and the connection can be kind of spotty, so we should keep it locally, organized into some kind of store.
So, we have posts and comments and their instances and the relationships between them form an object graph and we've decided we need to persist these things on disk, so that's what Core Data is for.
So, we'll use that and we'll start by translating our mock here into something a store can understand, a managed object model.
We'll need fields for everything, with attributes for things like the image's data as well as the time it was posted, and we'll need relationships for posts and comments. We've also defined a need for a store, but there's a lot involved in maintaining data on disk over time.
Luckily, Core Data provides a persistent store coordinator to manage that. The coordinator can do things like compare the app's model with the store's version and automatically migrate it forward as our app evolves. Finally, managed object context provide safe, fast, and predictable access to our data, even when we're using many at the same time through features like query generations, connection pooling, and history tracking.
Setting this all up requires finding the model and loading it and deciding where to keep the store, but a lot of these error paths can't actually fail once you've shipped your app, so Core Data provides a container type that dramatically reduces the amount of boilerplate required to set up your stack, just refer to the model by name, and the persistent container will load it out of the main bundle and keep a stored in a consistent location. This persistent container type encapsulates a whole stack and includes conveniences for a shared main queue view context as well as factory methods for generating background contexts as well as performing background work. It's also designed to be easy to work with as our app grows. For example, let's say we want to factor our model layer into its own framework. We can do that by creating a new framework target in Xcode and moving our code into it. It's all super easy, but when we move our model into the new target, in the built product, targets move from the app into the new framework, which is what's supposed to happen, but now NSPersistentContainer doesn't know where to find our model anymore. This is because it only checks the main bundle by default. Why stop there? Well, searching all of the app's bundles could get really slow for a complicated app and it's not a cost you want to pay every time you spin up a stack.
How do we fix this? Well, we could resuscitate the model out of the framework bundle ourselves and use one of the container's other initializers, like one that takes an explicit managed object model, but NSPersistentContainer actually has a way for you to change which bundle it searches.
See, NSPersistentContainer knows when it's been subclassed and will use the type of the subclass as a hint when it looks for the model. All we need to do to take advantage of this is to create a subclass. It doesn't even need to have anything in it.
Then, any code setting up through the container that wants to use our model can just adopt that subclass and the persistent container will check in our frameworks bundle for our model instead. So, that's fun, but since we're going through the effort of factoring our app's resources, wouldn't it be nice if we also improved the organization of our data on disk? By default, new persistent containers come with a store description for an SQLite store with automatic migration that on iOS lives in our app's documents directory. That was great when our model code was part of the app, but we should try to keep our new frameworks files from mingling too much with the apps.
Since we already subclassed NSPersistentContainer to make finding the model easier, let's build on that to improve this.
The brute force way to change a store's location is to directly modify the URL in the persistentStoreDescription before loading the store.
Sometimes that's what you want and we could use that pattern here, but we don't have to because NSPersistentContainer calls its own default directory URL method when creating persistent store descriptions. And it's made to be overridden. In this case, we can just append a path component, but this is also a good way to set up containers for caches or other kinds of stacks that need to keep their stores in different locations, like your tasks. So, now that we've got our Core Data stock all figured out, let's have a look at our app and some of the view controllers that we've written. It looks like we've got some pretty specialized view controllers here. Here's one that shows all of my posts as well as another that shows all posts by all authors. Even the detail views are duplicated. It feels a lot like we could have written half the code. All we should really need is one view controller for displaying a list of posts and another for displaying a single post. We can accomplish this by defining good boundaries in between our view controllers in the form of interfaces that take model objects.
Each controller gets configured by its model parameters and then they can customize their views in cells based on whether they're showing my posts or someone else's. When drafting view controllers using Core Data, list views should get fetch requests and detail views should get managed objects.
View controllers also need a managed object context, either the container's view context or some other main queue context. And this pattern for generalizing view controllers with Core Data isn't just for UIs; it works really well for utility types as well.
Instead of passing Core Data types for presentation, we can pass things like URLs or serialized data into background work controllers and turn those into new and updated managed objects using a background context instead of a view context to do our work.
Adopting this kind of interface and utility type is super easy since we own the initializer, so we can just require the parameters to create the controller. But how do we get our boundary variables into our view controllers? Well, if we're using segues, we can override the prepare method and get a reference to the destinationViewController and then configure it there. If we're using storyboards or nibs, then we already have code that has to cons up a destinationViewController, so all we need to do is set the properties before presentation. And, if we're driving stick, we can just write an initializer that explicitly defines the boundary conditions, just like we do with our utility types. OK. So, now we've got a fetch request and a context for our view controller, but before we smash them together to get our results, we should configure the fetch request a little bit more to make sure that our controller will have great performance.
Sometimes it makes sense to set a fetch limit, but in the case of our list view, batching makes more sense because we want to show all the data and we know exactly how many cells our view controller can fit on the screen at once. In general, at least one of these options should always be set for fetch requests that might return an unbounded number of results. So, at this point, we could turn our fetch request into objects and populate a list view with the results, but what if we want to keep the UI up to date with changes as they happen? Core Data has us covered here as well with the fetched results controller. Available on all platforms since Sierra, adopting the fetched results controller just requires writing an adaptor between the delegate protocol and the view it's driving. And to create one, all we need is a fetch request and a context.
The fetched results controller even supports driving more advanced list view concepts such as sections.
If we wanted to group posts into sections by the day they were posted, we could do it by extending the post type that's generated by Xcode with the computed property and passing the name of it to the fetched results controller's initializer.
This works well, but what if we have a view controller more complicated than just a list of our objects? What if we want to show something like a chart of the posts per day on our app? Well, the first thing we should do is not underestimate the power of fetched requests. I'm just one person, so in the last month, I haven't managed to post more than 40 pictures per day. Over the course of 30 days, that's still a fairly reasonable amount of data to pull out of the store at once. If the day property that we defined earlier was actually part of the entity in the model, then we could write a fetch request that counts up the number of posts grouped by the day they were posted. There's three parts to this request. The first one is just setting the range. We want the last 30 days of data. Next, we want to group together all results whose day attributes share the same value. Since we're now fetching aggregates instead of individual objects, we have to change the result type to something more sensible as well, in this case, a dictionary.
Finally, we define an expression that represents the number of objects in each group and tell the fetch requests to return that count along with the day it represents.
This fetch request returns 30 results, each of which is one point on our chart.
If you're into databases, this is the SQLite query that Core Data generates from that fetch request. It's exactly what you do if you're writing the query yourself. Core Data understands how to convert many expression functions into optimal database queries. A group by query can use aggregate functions such as average and sum and scalar queries, like a normal fetch request, can use scalar math and date functions, like abs for the absolute value and now for the current time. If you want to know more about what you can do with NSExpression, check out the documentation for its list of functions. Many of them are supported by fetch requests in Core Data.
OK. So, fetch requests can accomplish a lot through the use of expressions, but SQLite still reads every one of our posts through memory when computing the counts for our graph here. That works fine for charts showing the amount of posts generated by one human in a month, but what if we want to chart something bigger? What if we want to show a whole year or what if our little app starts handling orders of magnitude more data? Now the fetch request would be counting at least 50,000 posts one by one just to show 30 data points and that's not going to be fast enough. The mismatch between our views and our model has gotten to the point where we need to start doing some denormalization.
Denormalization is when we add redundant copies of data or metadata to improve read performance at the expense of some additional bookkeeping. Database indexes are a good example of this.
Adding count metadata to our store is exactly the kind of compromise we need to get our chart's performance again. So, let's look at how our model can group posts into counts by day. We'll need a new entity with two attributes, plus a bit of extra maintenance to keep them accurate. Grouping by day improves our fetch request so much that it guarantees good performance for charts covering years of data, so we only have to create this one level of denormalization and the fetch request that we passed to the chart view controller? It's super simple.
It's really not that much different than the fetch request that we'd pass off to any other list view, which is actually kind of sort of what a chart view is if you squint hard enough.
But what about that extra maintenance? We've got to increment the count whenever a post gets published and decrement it whenever a post is removed. We could do this in the methods that change the post object's relevant state, but a more foolproof solution is to update our counts in response to the context saving. We could just register for the managed object contextWillSave notification with a function that goes through all of the posts that have been inserted, incrementing the count for each day that's relevant, and another loop going through all of the deleted objects, decrementing the count for each day. And that affects the state of the context before it commits to the database, so it all winds up happening in one transaction, so this scales really well, which is useful because my teammate Nick Gillett is here to talk about how Core Data can help us as our little app scales beyond our wildest dreams. Nick. Thanks, Scott. So, as Scott said, as your applications grow, they get more and more complex and at Core Data it's really important to us that your applications do grow. In fact, we want this. That's the whole reason we exist is to help you manage this growth, make it efficient for you to work with, and help you give more value to your customers. But this happens in ways that are very specific to your application. It's also highly aligned with your customer experience or the way that you want them to experience your application. Unfortunately, like all complex systems, as it grows and becomes more complex, it also tends toward chaos. So, today we're going to talk about ways that Core Data can help you manage this chaos and give it some structure. We'll talk about building predictable behaviors and helping you build tunable containers that you can align with your experience metrics.
What does that mean? Well, when we think of metrics, there's a couple of different ways that we can think about them. The first is in alignment with our customers. And usually we define these as things that they experience, like having a consistent user interface or a responsive scroll view, and also as delight. But those are really hard for us to capture as engineers. So, we translate them into engineering metrics, things like peak memory consumption, how much battery drains during a given task or how much CPU time is burned during a given task. And, finally, how much IO we do during a given task.
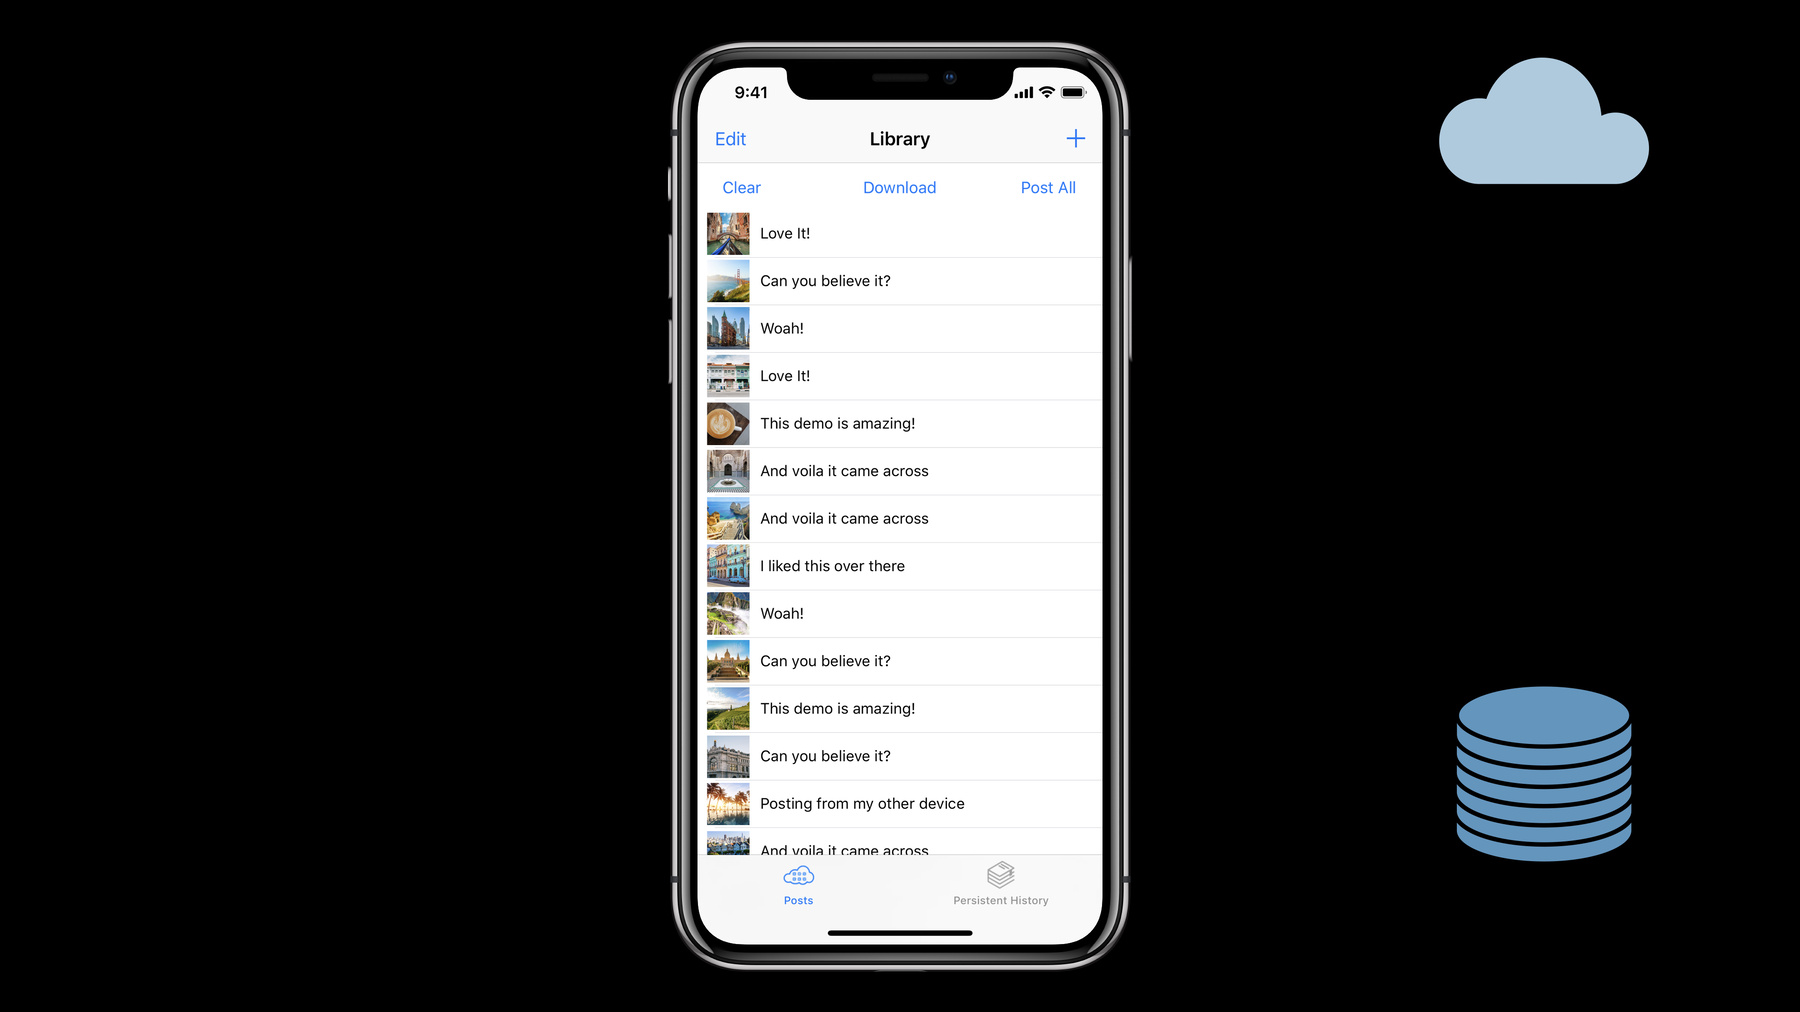
To make this a little more concrete, we'll use this application. Some of you may remember the history demo application that was introduced last year at WWDC and I've modified it for the purposes of this talk. There are a few actions here that a customer can take while using our application. The first is they can add a single post to our database by hitting the + button.
They can also download any pending data from the server by tapping Download.
And, finally, for anything that hasn't yet been uploaded to a server, they can tap Post All.
Now, this application has a fairly small set of interactions that a customer can take, and yet, as these happen concurrently, it tends towards chaos. So, we can see that even with this small set of actions, things that go on concurrently could cause a number of different state changes in the application and the worst thing for us is to end up with a user experience that looks like this. This notion of partial completeness doesn't make sense to our customers. In fact, it doesn't make sense to us either.
Core Data is here to help with that with query generations. Query generations were introduced in 2016 in our What's New in Core Data session. So, if you're not yet familiar with them, I highly recommend that you check out that session for more information about how they work. What you do need to know is that they require wall journal mode and only work with SQLite.
The goal of query generations is to isolate your managed object contexts from competing work. This could be rights to the background or actions that the user is taking that you're not yet ready to manifest in a given context.
Query generations provide a consistent, durable view of the database that will return the same results for fetches regardless of what other contexts are writing to the database at a given time.
The best part is we can adopt them in one line of code.
This is a typical change for reloading a table view. We would just have to insert a call to NSManagedObjectContext setQueryGenerationFrom token with the current query generation.
And when it comes time to update them, we can update them as we normally do by using NSMangedObjectContextDidSave notification. And this allows us to manifest changes to the application's data in the UI at the right time.
But what if the data that we're writing isn't related to the UI, such as downloading some comments that Scott mentioned earlier? In this case, we don't want that data to manifest in the user interface or cause changes to it because none of the change will be visible to the user. So, we can actually filter out these updates by using history tracking. Persistent history tracking was new in iOS 11 and macOS 10.13. We introduced it in our session, What's New in Core Data, last year at WWDC, and for more information about how it works and what the underlying features are of it, you can use that session as a reference.
Persistent history tracking is a great way to get a persistent record of each transaction that connects to the database and this is useful to us for a couple of different reasons. For the purposes of this talk, though, we'll be considering NSPersistentHistoryChange, which gives us a changedObjectID and a set of updatedProperties. And NSPersistentHistoryTransaction which gives us a set of changes and an objectIDNotification.
So, let's consider the following set of changes. As you can see, these are posts that are being inserted to our database and when this happens, given our table view, we would want to refresh the UI, which we can do by using the objectIDNotification. These are analogous to NSManageObjectContextDidSave notifications and can be merged in using the same API.
But if we downloaded a list of comments that we don't want to manifest in a user update for, we can filter them. Using this small amount of code, we can filter out the changes from a given transaction to decide if any of them were relevant to the post entity and in that way we won't refresh the UI and cause an unnecessary blip or stutter to the user.
But as you can see here, we're actually only using a small amount of the post content. In fact, we're only using two properties, the image and the title.
And so we can do better than just filtering out by entity. We can actually filter out by updated properties using the history changes and in this way we can create highly-targeted updates to our user experience that align with changes that will be visible to them. But Core Data can also help you support new interactions for your users. As your data becomes more complex and grows in scale, some editing operations can get more expensive. For example, consider a simple photos browser. Typically, when our applications grow, we want to -- we want to introduce new functionality that makes it easier to perform repetitive tasks, such as multiple selection. And Core Data can support this by using batch operations.
In fact, in just a couple lines of code we can mark an entire set of photos as a favorite or not. And in just one line of code, we can purge or delete a set of records from the database using a batch delete operation. And these operations scale in ways that aren't possible by faulting the objects into memory. For example, during a delete, a traditional delete by calling NSManagedObject.delete will grow with the size of the records in the database. And as you delete objects and their memory gets faulted into the context, this gets more and more expensive the larger your database gets. But with batch operations, we can perform the same mutations in just a fraction of the memory. And this has the curve that we want as data increases, where the larger the data set is, the less memory we use, using up to about 7% of the memory of a traditional delete at 10 million rows.
So, this is a very powerful way to save resources on your customer's device. But one of the traditional problems with batch operations is that they were difficult to work with because they don't generate save notifications. That's where history tracking comes back in. With persistent history tracking, we can fetch out the transactions from the database that occurred as part of the batch delete or update and we can use the objectIDNotification method to generate a notification that works like a save notification. In this way, the fetched results controller or any other context in your application can update to those notifications incrementally. And so those are some ways you can manage growing data with Core Data, but how about your workflow itself? What can Core Data do for you as a developer and engineer to make it easier to build and test your applications? The first thing is that we can help future you today.
As you may know, NSKeyedArchiver is changing. We're adopting secure coding across the entire platform and the KeyedArchiver API has changed significantly this year in support of that.
For Core Data, this means that value transformers are changing, so if you have a transformable property in your managed object model and you're not sending a value transformer today, you used to be getting NSKeyedUnarchive FromDataTransformer as your default value transformer. In the future, you'll be getting NSSecureUnarchive FromDataTransformer and this implements secure coding under the covers and you should adopt it today. There was a great talk this morning about exactly this topic called the Data You Can Trust and I highly recommend that you view it to get more information about secure coding and how to make your applications more resilient.
You can specify this in the model editor with a transformable property by the value transformer name field.
And today, we want you to implement this on your own. This will become the default in a future release and in a future release Xcode will also start emitting a warning for anyone that's using the default value transformer name.
If you're building your models in code, you can set it by using the valueTransformerName property on NSAttribute description.
This should be transparent for you if you're not encoding custom class types. So, for plist types, this is a no op. You simply change the value transformer name and you'll get the new secure coding behavior. However, if you are implementing custom classes, those classes need to adopt secure coding and you can come see us in the labs for help with that. But we can help you more. At Core Data, we've spent time building in new debugging tools over the years that can help you understand what's going on under the stack. So, this is a picture of our preferred default scheme configuration. We have a couple of process arguments that we have that can help you get more debugging information about SQLite, but the big one you should always run with is com.apple.Core Data.ConcurrencyDebug. And this will catch any queue exceptions in your applications, so areas that you may be transferring objects between main and background queue contexts or areas that you may not be obeying a managed object's actual context. SQLite also has a number of interesting environment variables, so their threading and file assertions are a great way to ensure you have correctness in your application around their API as well as the file system. And auto tracing is a great way for you to see what's going on under the covers, an additional tour on debug logging. com.apple.Core Data.SQLDebug has four levels. The first level is the most interesting and the least of a performance hit. The fourth level is the most verbose, but does cause significant performance hit when you run with it. When you enable SQL debugging and our multi-threading assertions, you'll see a couple of logs in the console and these are the indication that the assertions are enabled and running correctly.
With our SQL debugging on, you'll be able to see things like select statements for our fetch requests as well as how long they took. And, if you're set to level four, you'll even get explain, which will show you the query plan for a given select statement. And here we can see that our table view is selected via table scan and then using a temporary B-tree in memory for the order by, which is on the timestamp. This is a potential performance problem and as you're running your application you can use messages like this to see where you may be doing more work than you need to.
So, how would we fix this? Well, turns out SQLite 3 can actually tell us. If we open a database and hand it the select query from our SQL logs, we can enable a mode called Expert, which will analyze the query and give us the ideal solution of optimizing it by creating a covering index.
And we can do this in the model editor by adding a fetch index to our post entity. Here I've configured it to run on the timestamp and fetch them out in descending order because we're showing the most recent posts at the top of the table view.
When we run the application again, we see the same select logs.
Except that this time we see that the select query hits the covering index during the query. Explain shows us that the query will use the covering index for its order by. Core Data supports many types of indexing, including compound indexes using R-trees. And these are great for creating any kind of query or optimizing a query that uses a bounding box in its select statement. This is most commonly done with locations and we can set this up by adding another index to our post entity, which works in the latitude and longitude property that I added for the purposes of this slide.
We change the query type in this box by selecting R-tree. And then we can set up our predicate on the fetch request to say get all of the posts that happen inside of continental China.
This predicate is a little more advanced because it uses functions inside the actual select statement to hit the index that we created in the managed object model.
When we run our application without this predicate and without this index, we see the same results that we saw before where we're hitting only the timestamp index. But when we run it with our new index and predicate, we see that SQLite is using the index to generate faster results for both of the between statements.
Unfortunately, because our timestamp index doesn't have any bounding predicates on it, SQLite can't use it for the sort. So, the optimization that we've chosen here is to use a compound index to first filter out the result set to a smaller set of objects and then we'll do an in-memory B-tree sort for the order by. As you can see, this index increases the performance of our fetch by about 25%.
In this case, my performance test was run over a size of about 100,000 rows and we saw around 130 milliseconds of improvement for just the fetch.
Which brings me to my next topic of testing with Core Data.
As you may know, we really like tests. Tests are awesome. And, at Core Data, we use them internally for both correctness as well as learning. They're a great way to learn about the functionality of Core Data and how our API behaves under a given set of conditions.
They're also a great way to verify your assumptions about how Core Data works and how it's going to help your customers have a better experience with your application. As you saw in the previous example, we can verify that our R-tree index actually does give us a performance benefit even though it's using an in-memory B-tree sort.
They also capture your product requirements, and this is really important to us at Core Data because it helps us communicate around your expectations. With tests, we can see what you're doing in code and how you expect those lines of code to behave for your customers.
There are some important things that you can set up to make this easy for yourself, such as a base class that generates a persistent container.
This base class on the screen happens to use a file URL of /dev/null for the persistent store and this is a great way of making tests that operate on a small set of managed objects run very, very quickly because they'll run entirely in memory. When you do this, SQLite materializes an in-memory store for you that can be very efficient, but because it's in memory, if you have a lot of data, this will cause a lot of memory growth in your test suite.
You should have at least one test, though, that actually materializes your store file on disk. And this is because if you can't open your store for your test suite, it's highly likely that your customer can't either.
If your persistent container is in the application delegate, you can have a test base class that grabs the container out and writes directly to that store. But I must caution you to take care when you do this, because that means that you're writing to the store file that's in use by the application, so if you run your test on a personal device, you'll see the effects of the unit test when you open your application the next time. What if I told you I could insert 100,000 records in just seven lines of code? I'm cheating a little bit. I was going to leave this as an exercise to the reader, but this type of scaffolding is a great way to help you build a test suite that evaluates your invariance around your data.
By building these methods ahead of time, as your data changes or you become aware of new use cases for your application, you can iterate on these to build new edge cases, build new structures for your object graph, or evaluate the behavior of certain functionality under the covers, such as performance. This is the unit test scaffold that I used to build a performance test for the R-tree query. In just a handful of lines of code, we get high confidence on the performance of our fetch.
And these types of tests are very informative when you're trying to evaluate tradeoffs between different features and functionality in Core Data. These three lines of code generate a new managed object context and container for us for our test to use. Now, this is important primarily because the setup and teardown logic in tests can sometimes affect their performance. So, you'll need to take care to analyze whether or not you're actually testing the teardown performance or the setup performance or the actual runtime performance of the queries you're evaluating.
And after you've run these tests, you can file good bugs.
We love bugs, especially from you guys because we're building a product to help you build your applications. But, bug reports without tests or without a sample application are very hard for us to communicate around because, as I mentioned earlier, they don't capture your product requirements and expectations in the same way that well-structured tests do. In fact, in an application attached to our radar that has a test suite or even just a bare sample application with some UI that explains your constraints and concerns to us, we can get back to you much more rapidly about what's going on and what you should do about it. They also help us verify the correctness of our fixes later. So, if you're going to file a bug, please take some time and write a test for us.
That's all I have today. Come see us at lab tomorrow. We are here from 1:30 on in Technology Lab 7 and I highly recommend that you check out Testing Tips and Tricks tomorrow in Hall 2 at 3:20.
Thanks. [ Applause ]
-