App Store Connect Help
App Store Connect Manage featuring nominations Nominate your app for featuring
Nominate your app for featuring
To nominate your app to be featured, whether it's a new launch or an exciting update, submit your plans through App Store Connect. Our editorial team will consider these plans for potential featuring opportunities. Learn more.
Required role: Account Holder, Admin, App Manager, or Marketing. View role permissions.
Create and submit nominations
If you'd like your app to be considered for App Store featuring, submit a new nomination with details about your app. You can submit nominations individually through App Store Connect or upload multiple nominations using a CSV file.
Note: In App Store Connect, individual nominations are initially saved as drafts and can be edited before submission. In contrast, nominations imported through CSV are submitted automatically and can’t be saved as drafts. You can edit these nominations after submission.
Create a single nomination in App Store Connect
-
In Apps, select the app you want to view.
-
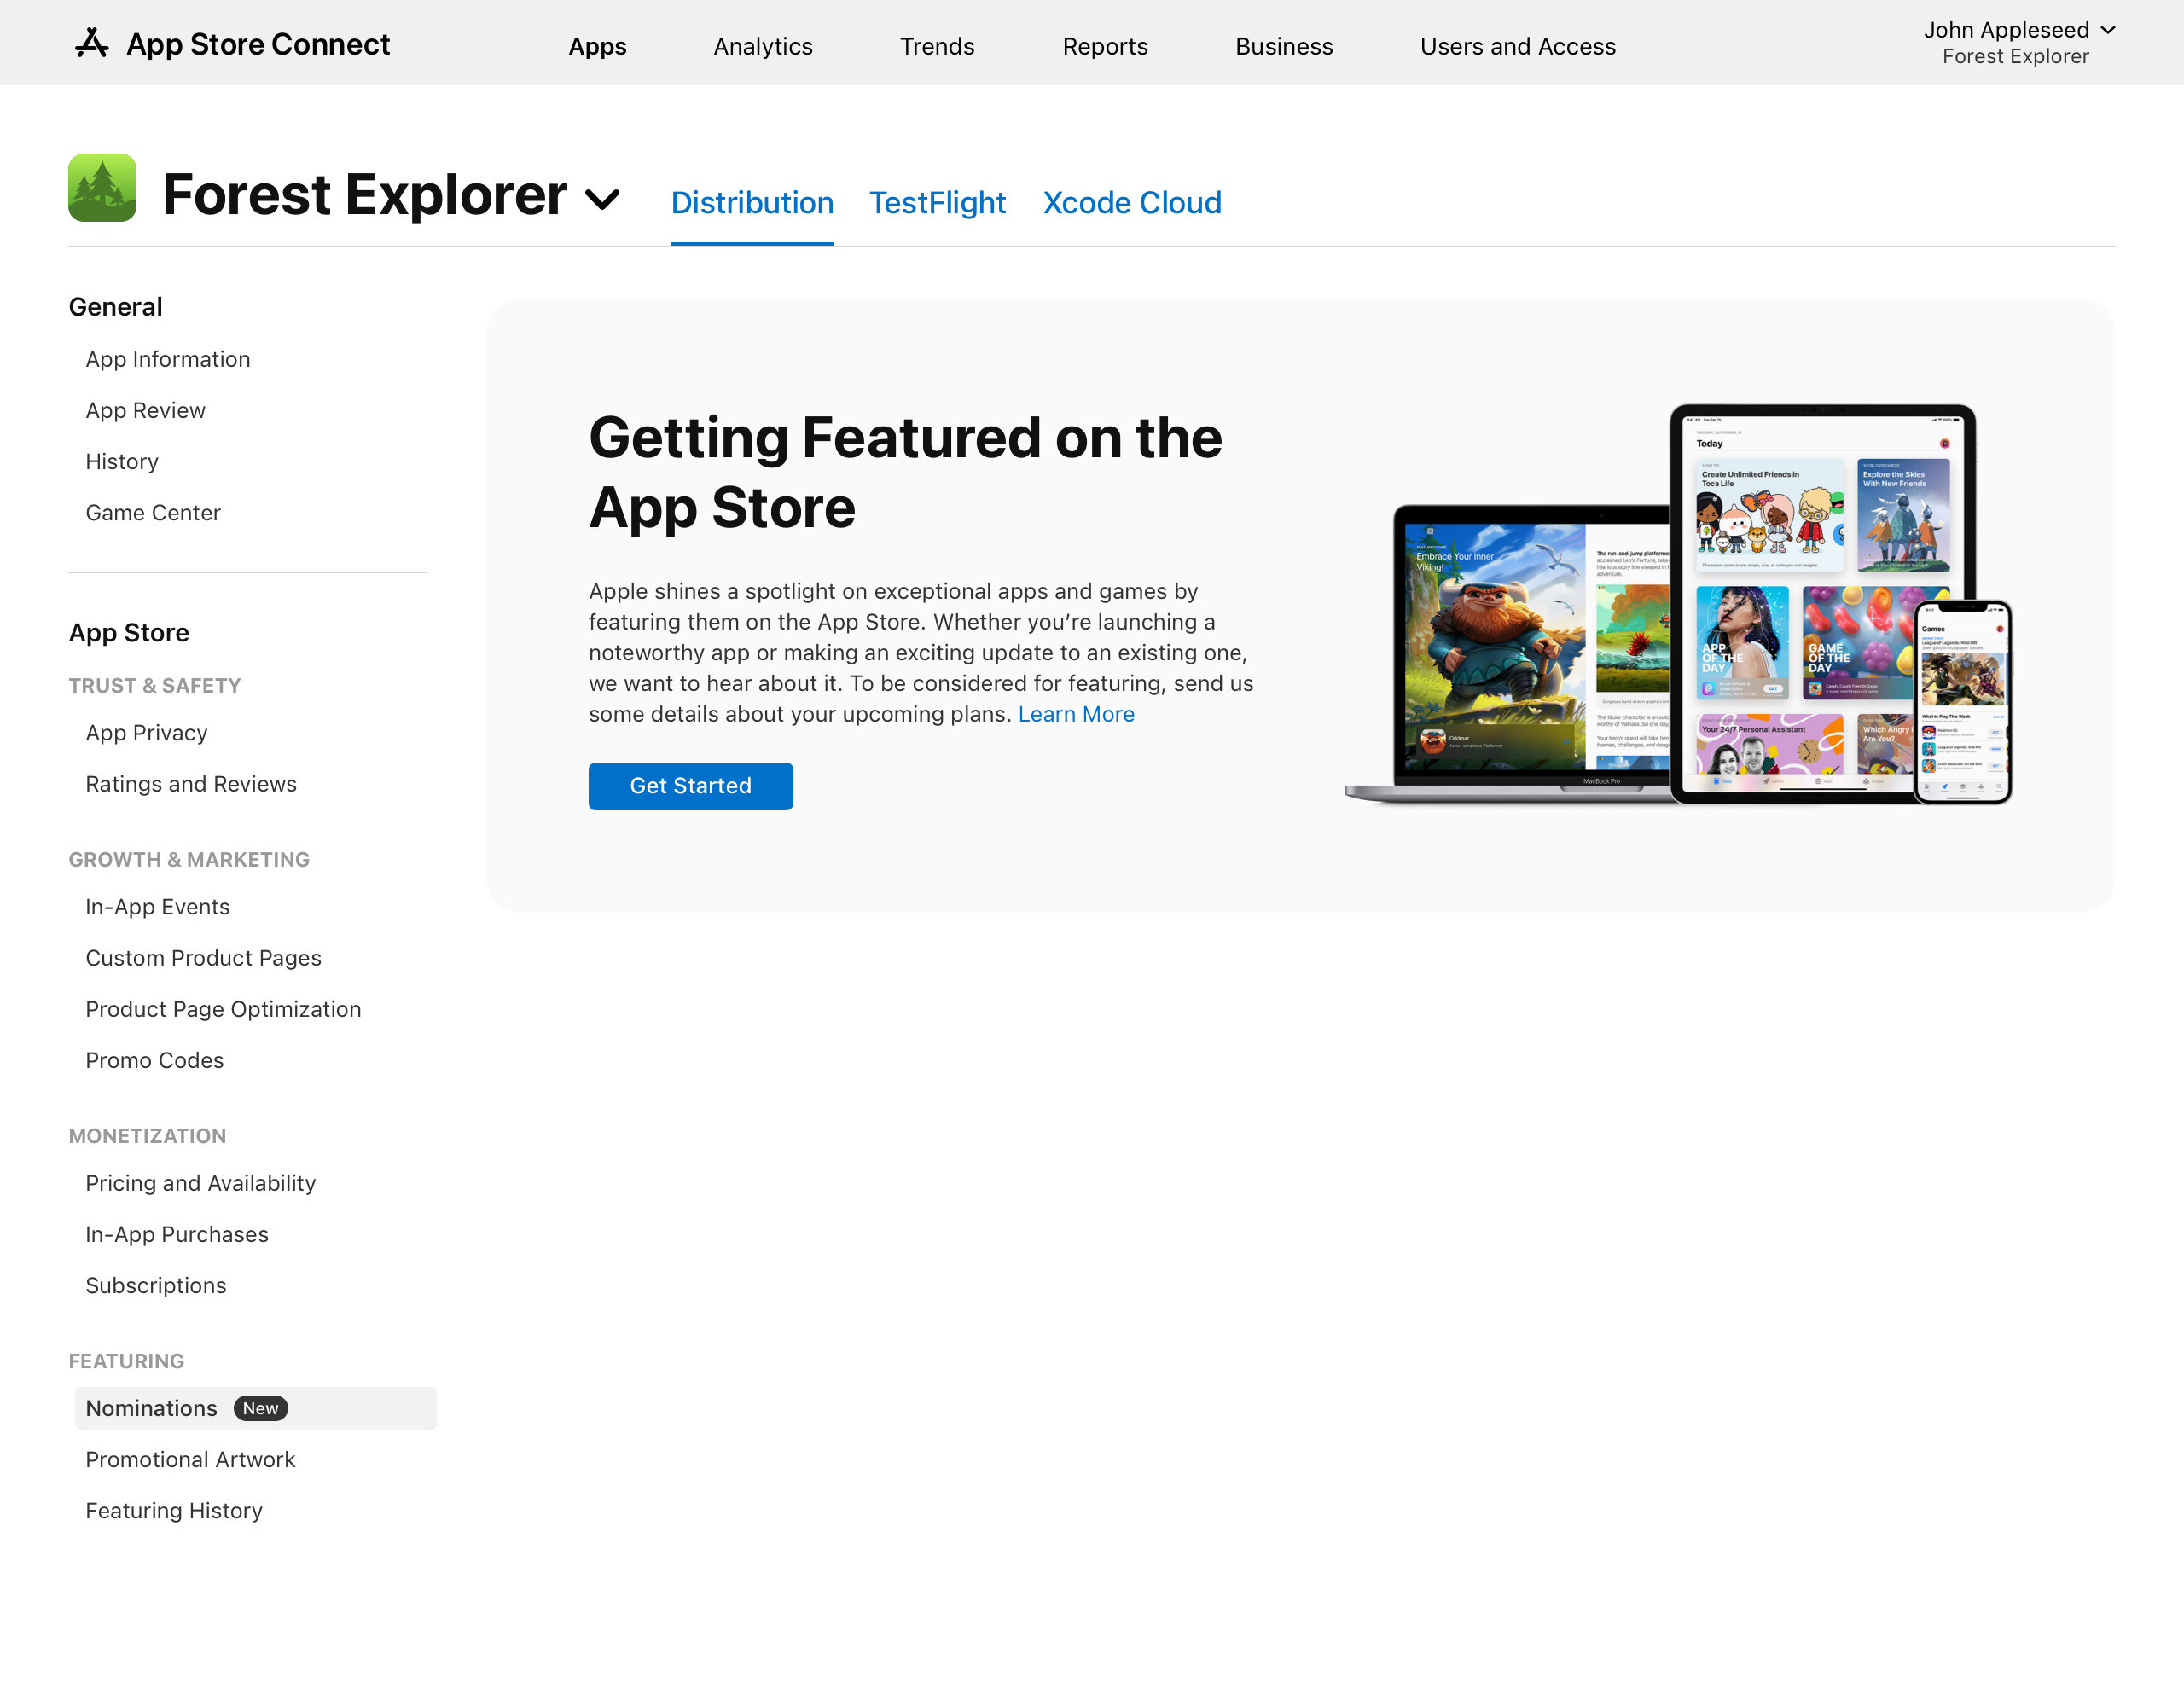
In the sidebar, under Featuring, click Nominations.
-
Click the "+" next to Nominations on the Featuring Nominations page, then select Create Nomination.
Note: If it's your first time creating a nomination, click Get Started. In the dialog that appears, click Create Nomination.
 Tip: If you have multiple nominations to submit in bulk, import them using a CSV file. Learn more about how to import nominations.
-
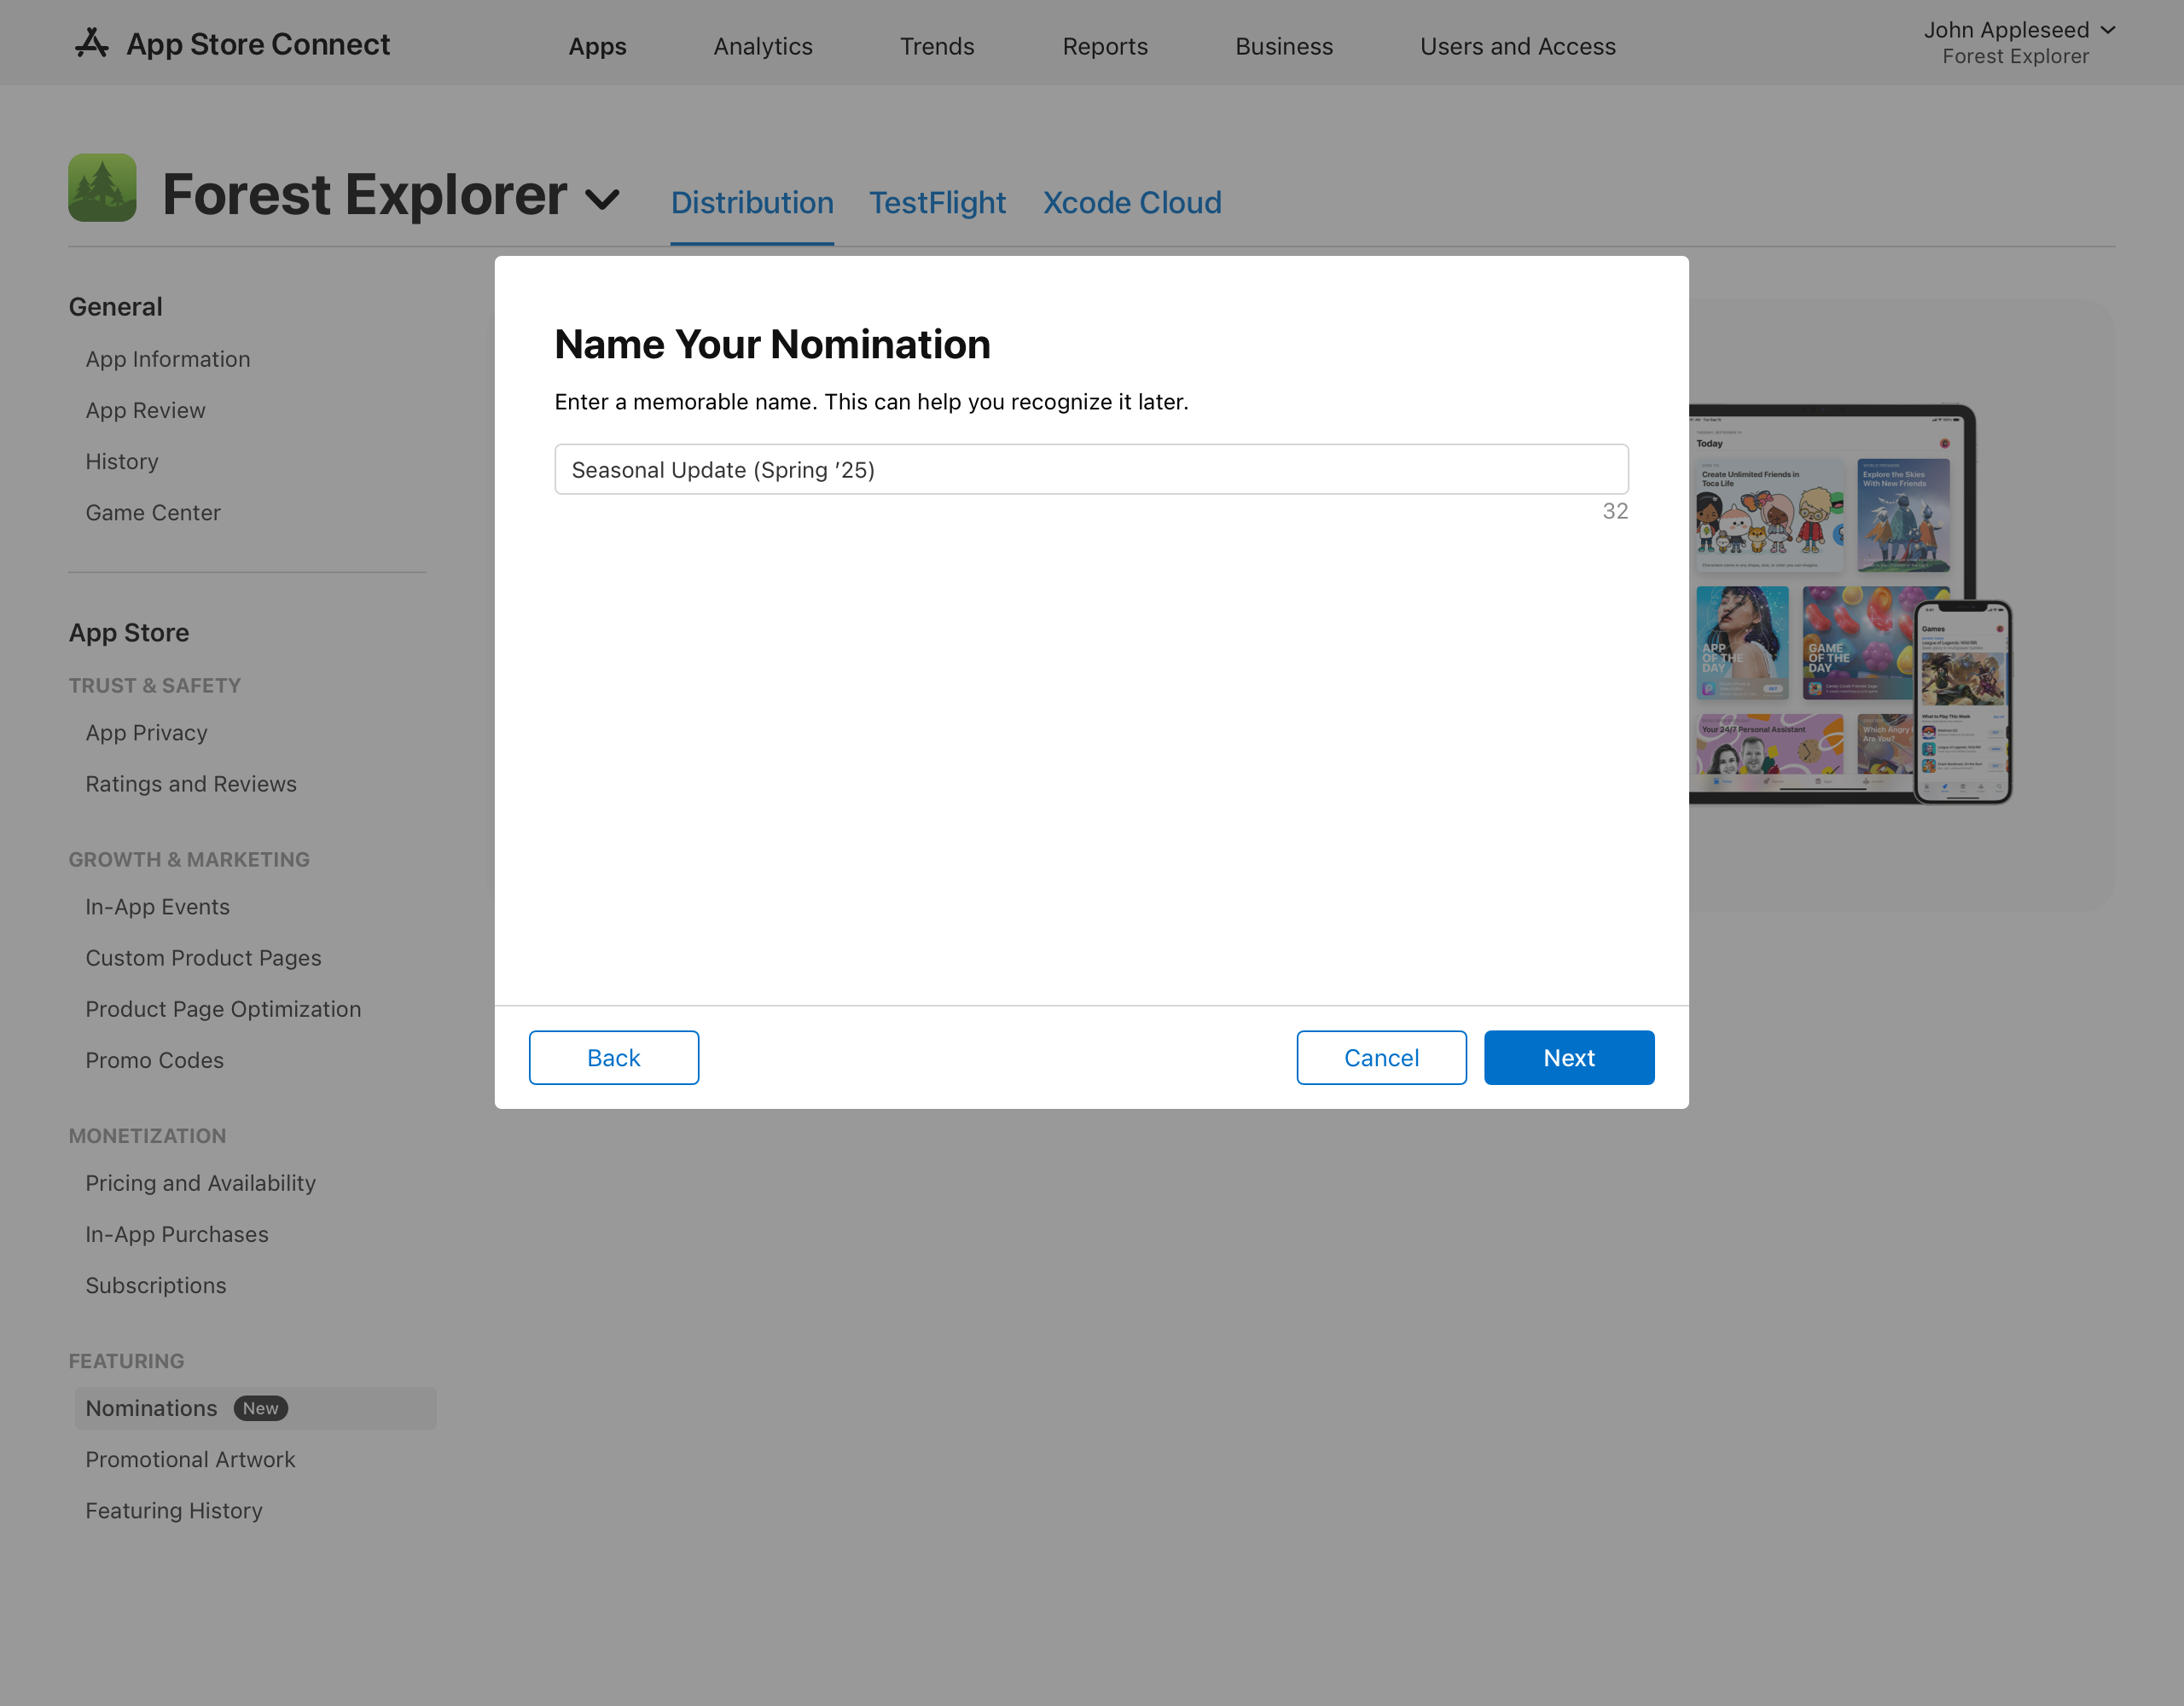
In the dialog that appears, enter a memorable name for your nomination, then click Next.
-
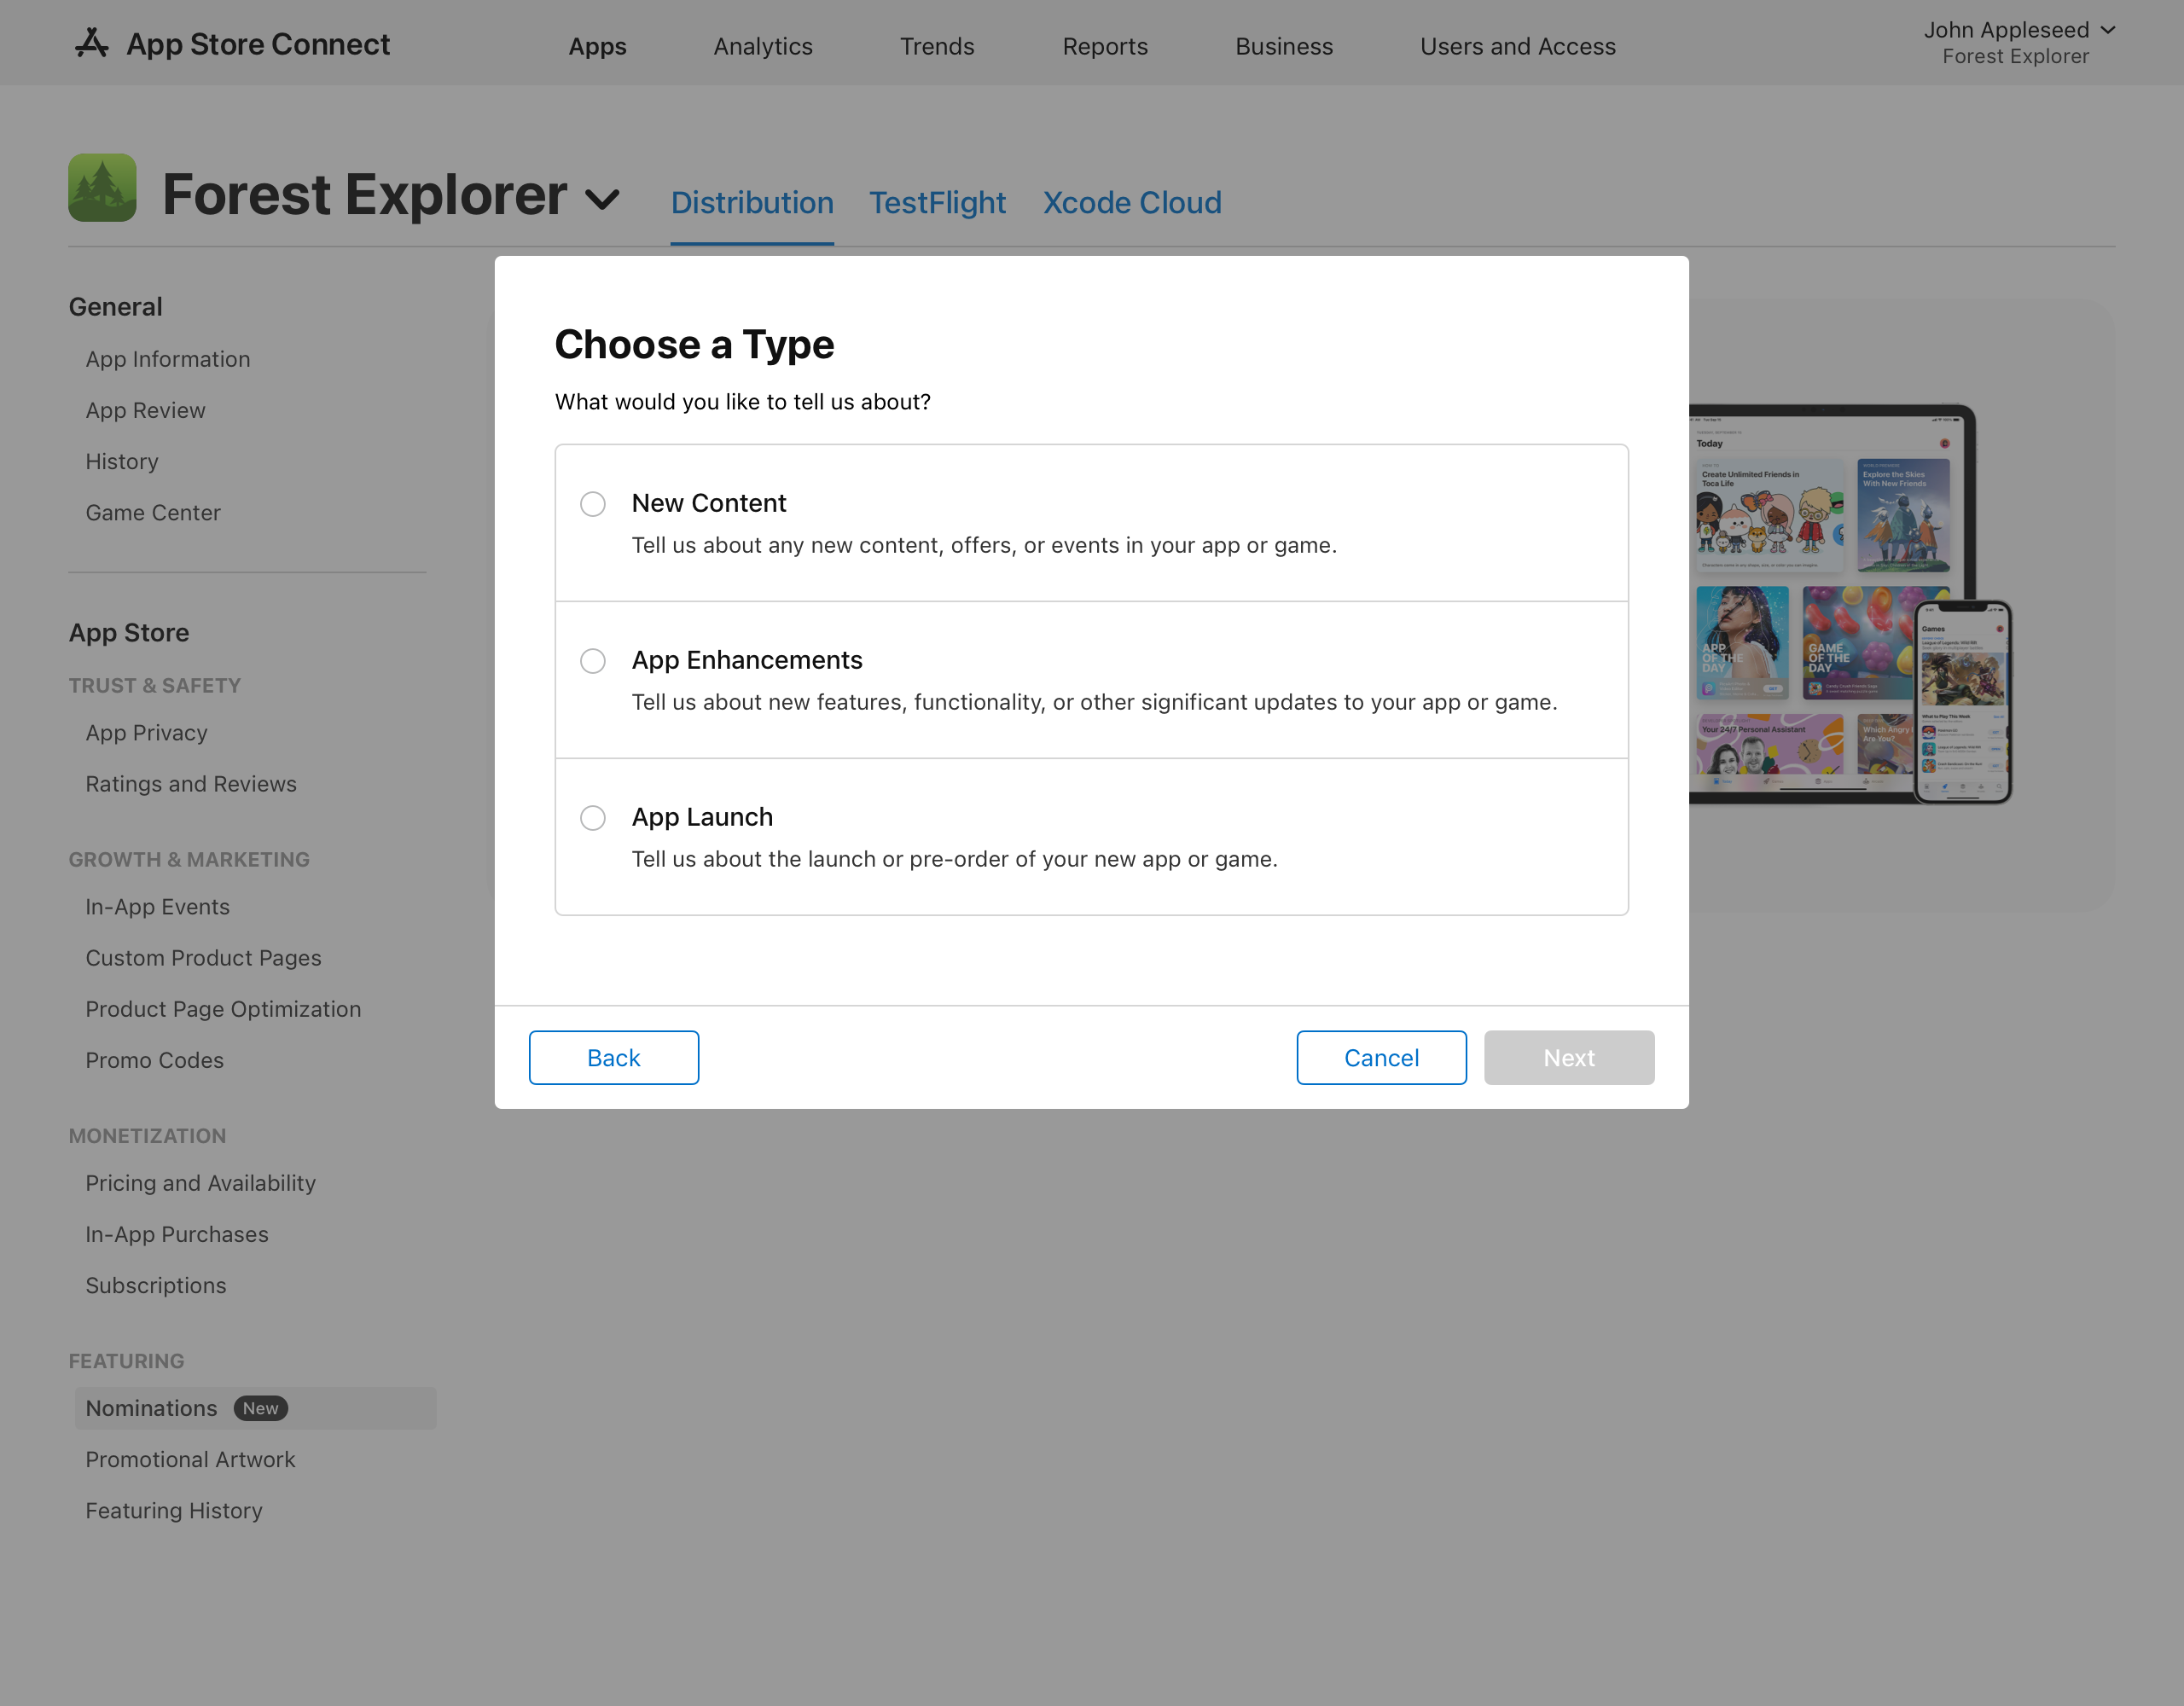
Select the information you'd like to provide, then click Next.
-
New Content: Tell us about any new content, offers, or events in your app or game.
-
App Enhancements: Tell us about new features, functionality, or other significant updates to your app or game.
-
App Launch: Tell us about the launch or pre-order of your new app or game.
-
-
Provide a detailed description so that the Editorial team can understand what changes are coming and click Next.
Clearly state the purpose and priority level of your nomination for new content or enhancements. The description should include specific details about the update and articulate the objectives of the new feature.
-
Choose the desired date or time frame for the publication of your app from the dropdown menu, then click Save. You can select a specific day or a custom range.
Tip: To ensure operational efficiency, we recommend submitting plans as early as possible, with a minimum lead time of 3 weeks.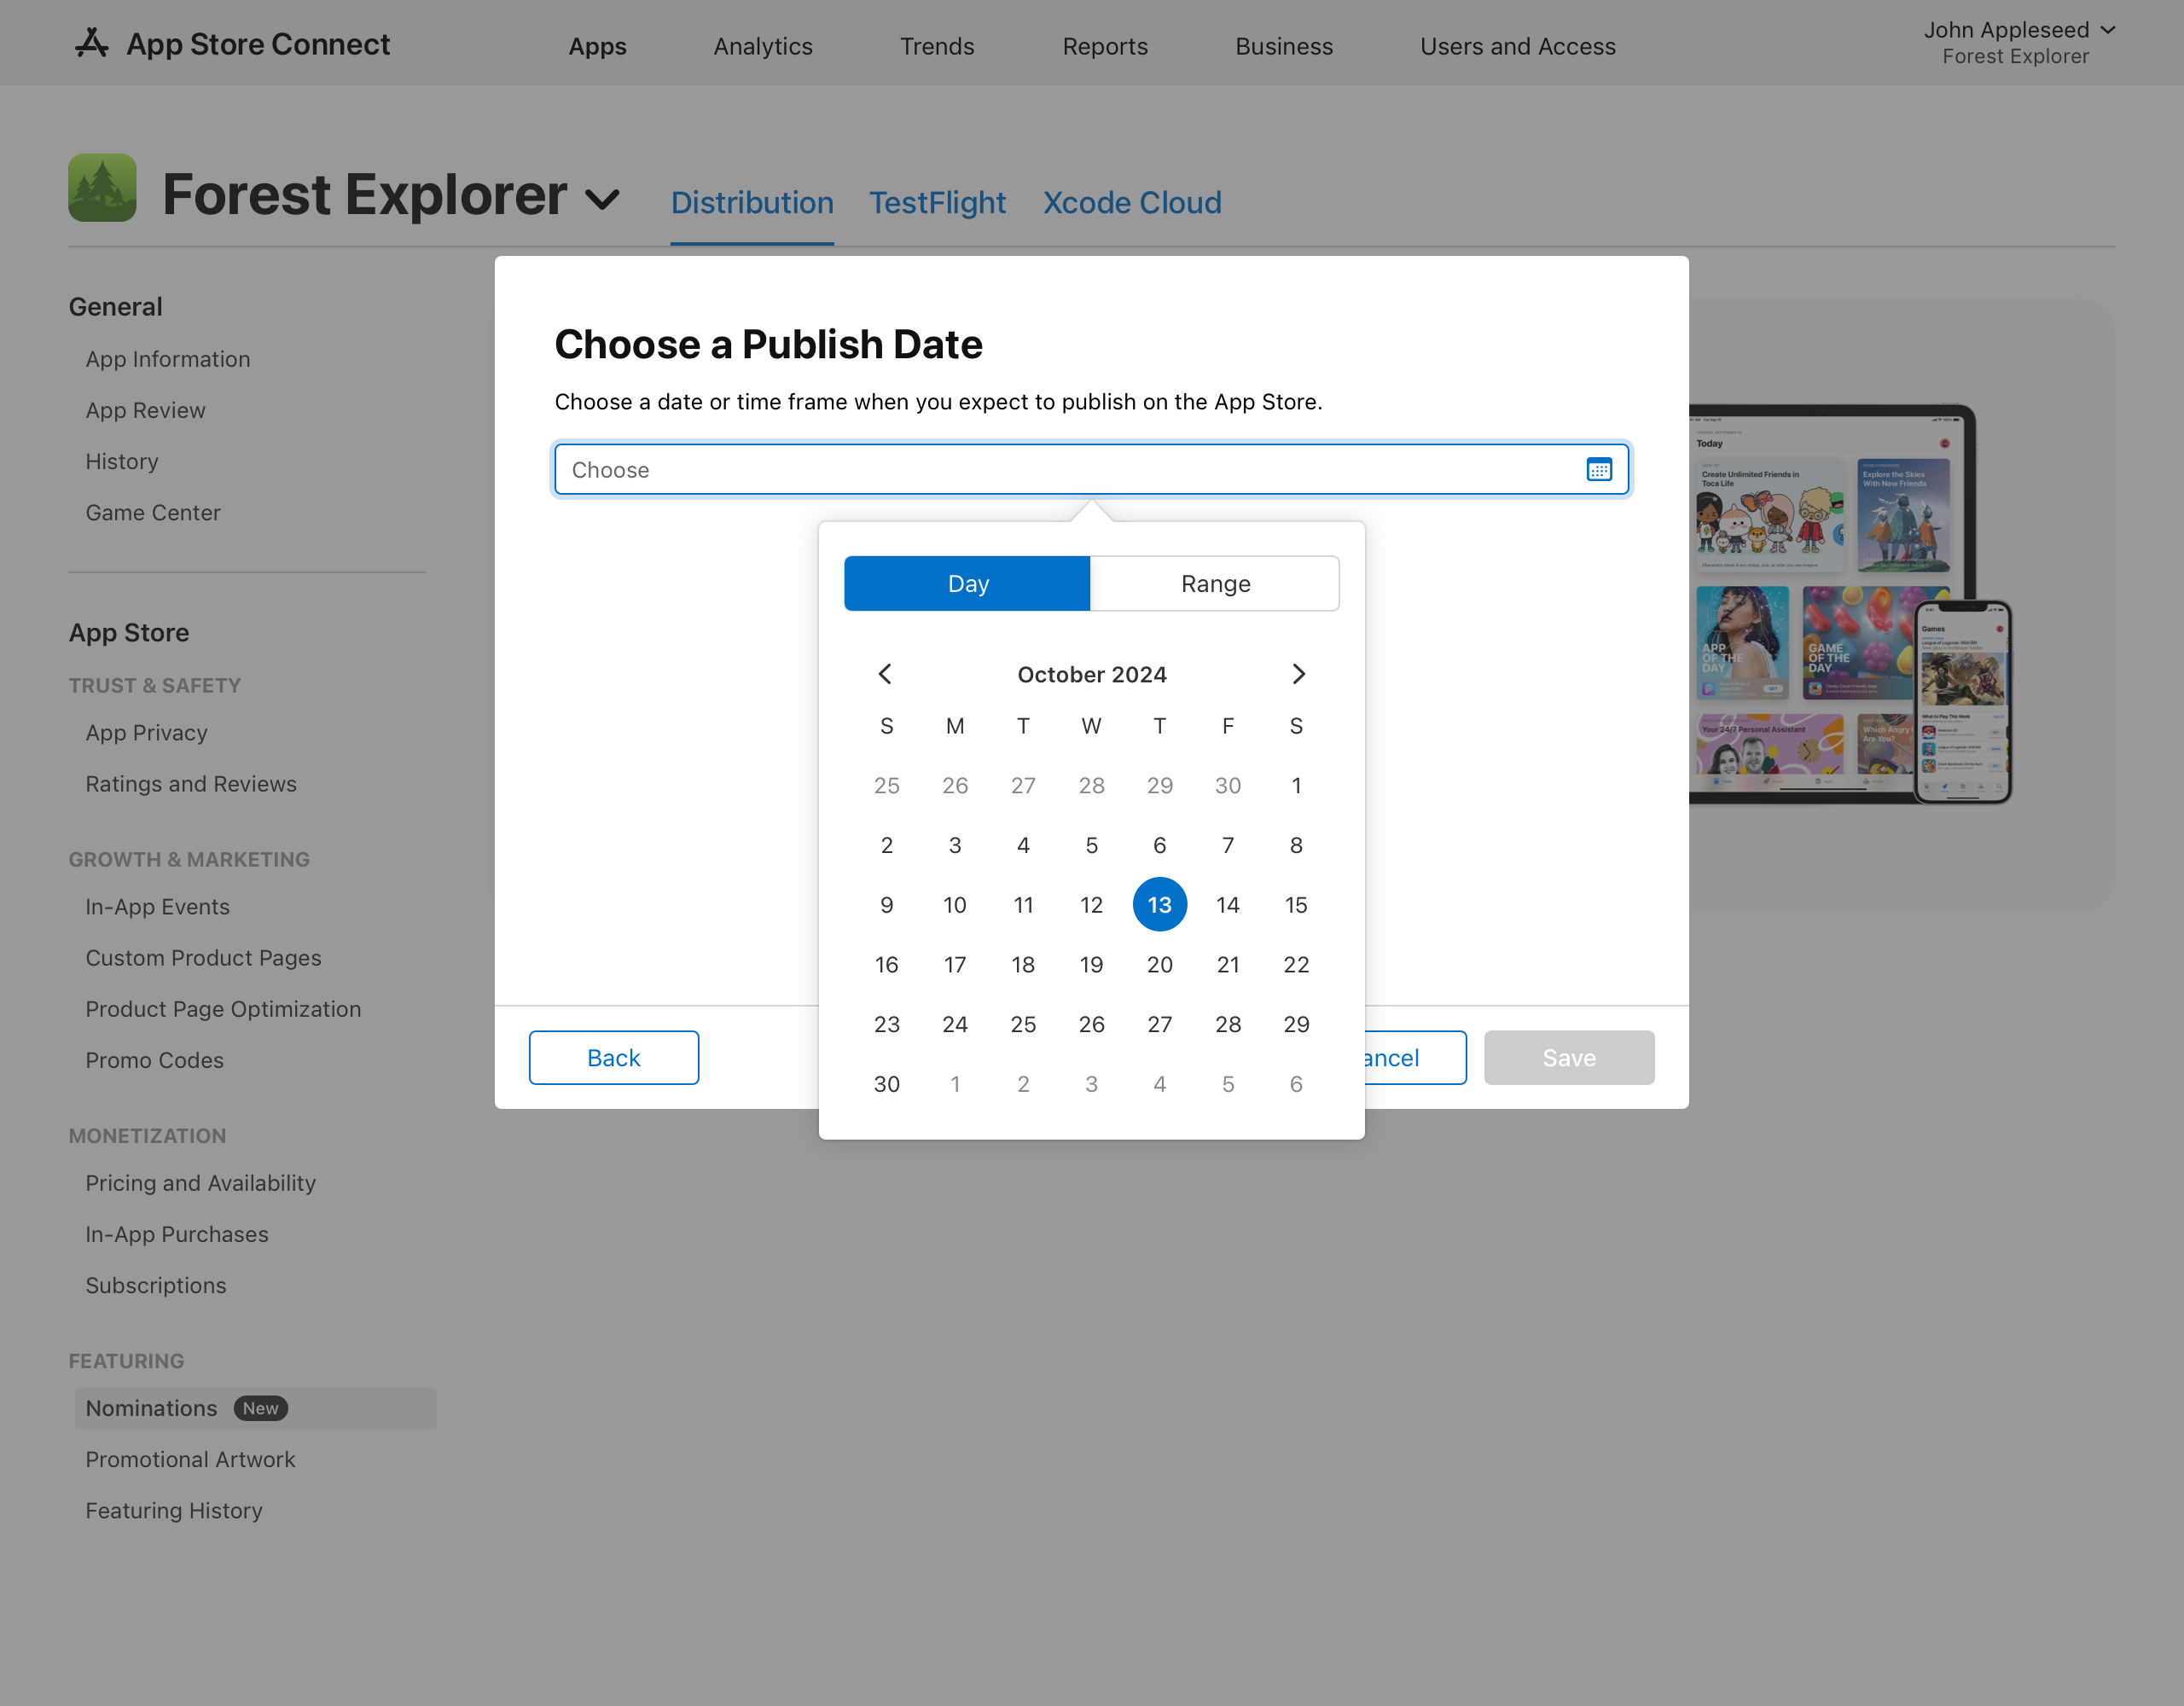
Note: The date selected is based on your device’s local timezone settings.
-
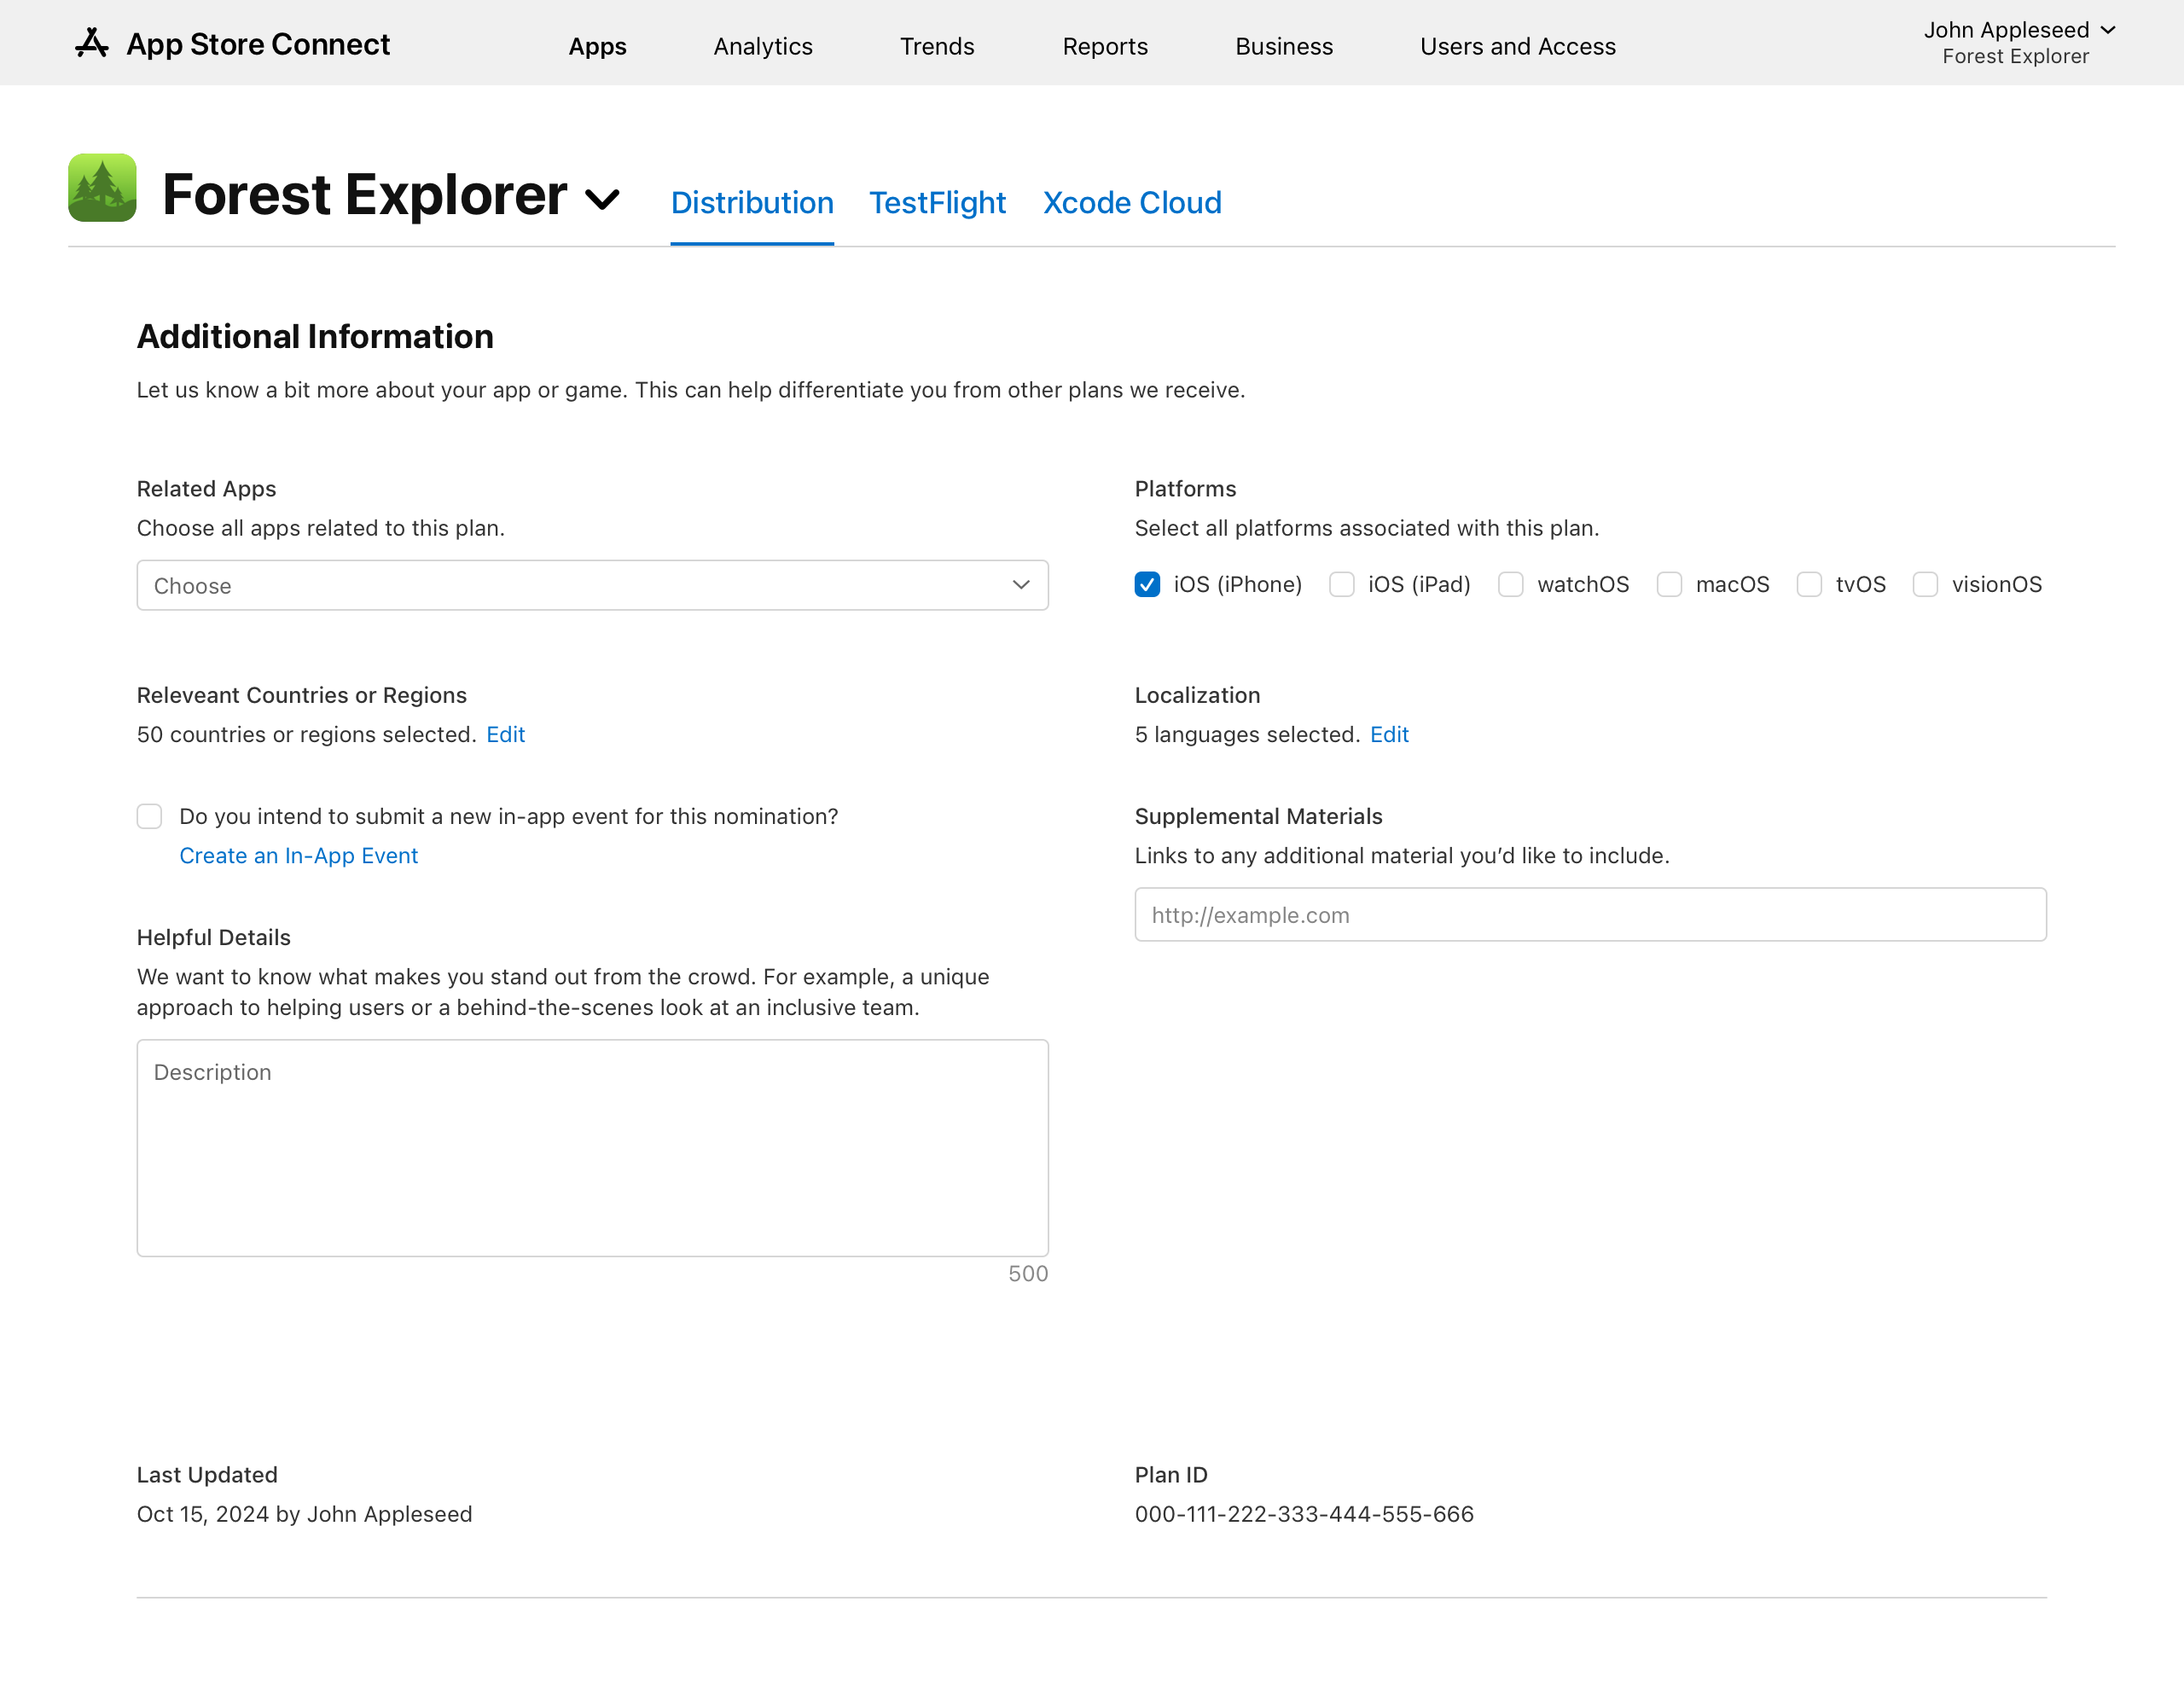
Review the plan details and verify the information you have provided. If you wish to add more details, scroll to the Additional Information section.
-
Related apps: You may submit up to 10 apps total from the same developer account.
-
Platforms: Select the platform(s) for which this nomination is relevant. Note that In-App Events are only available on iPhone and iPad apps.
-
Relevant Countries or Regions: Select the country or region your nomination is relevant for. Note countries and regions your app is available in will automatically be selected. You can edit if applicable.
-
Localizations: The localizations your app is available in will be automatically selected. You can make edits if applicable.
-
In-App Events: If an app in your nomination has an In-App Event, you can attach it to the nomination. We recommend attaching the In-App Event as early as possible.
-
Supplemental Materials: You may provide up to 5 URLs that support your nominations. These links can include additional documents, files, art assets, and even TestFlight public links.
-
Helpful Details: You may include details about accessibility, inclusivity, level of priority of your nomination, or any unique aspects of your app or team that you’d like us to know. Our editorial team will take all of this information into account when reviewing your submission.
If you're not ready to submit, click Save as Draft at the top of the page to save your progress. The nomination will then be moved to the Drafts section for future editing.
-
-
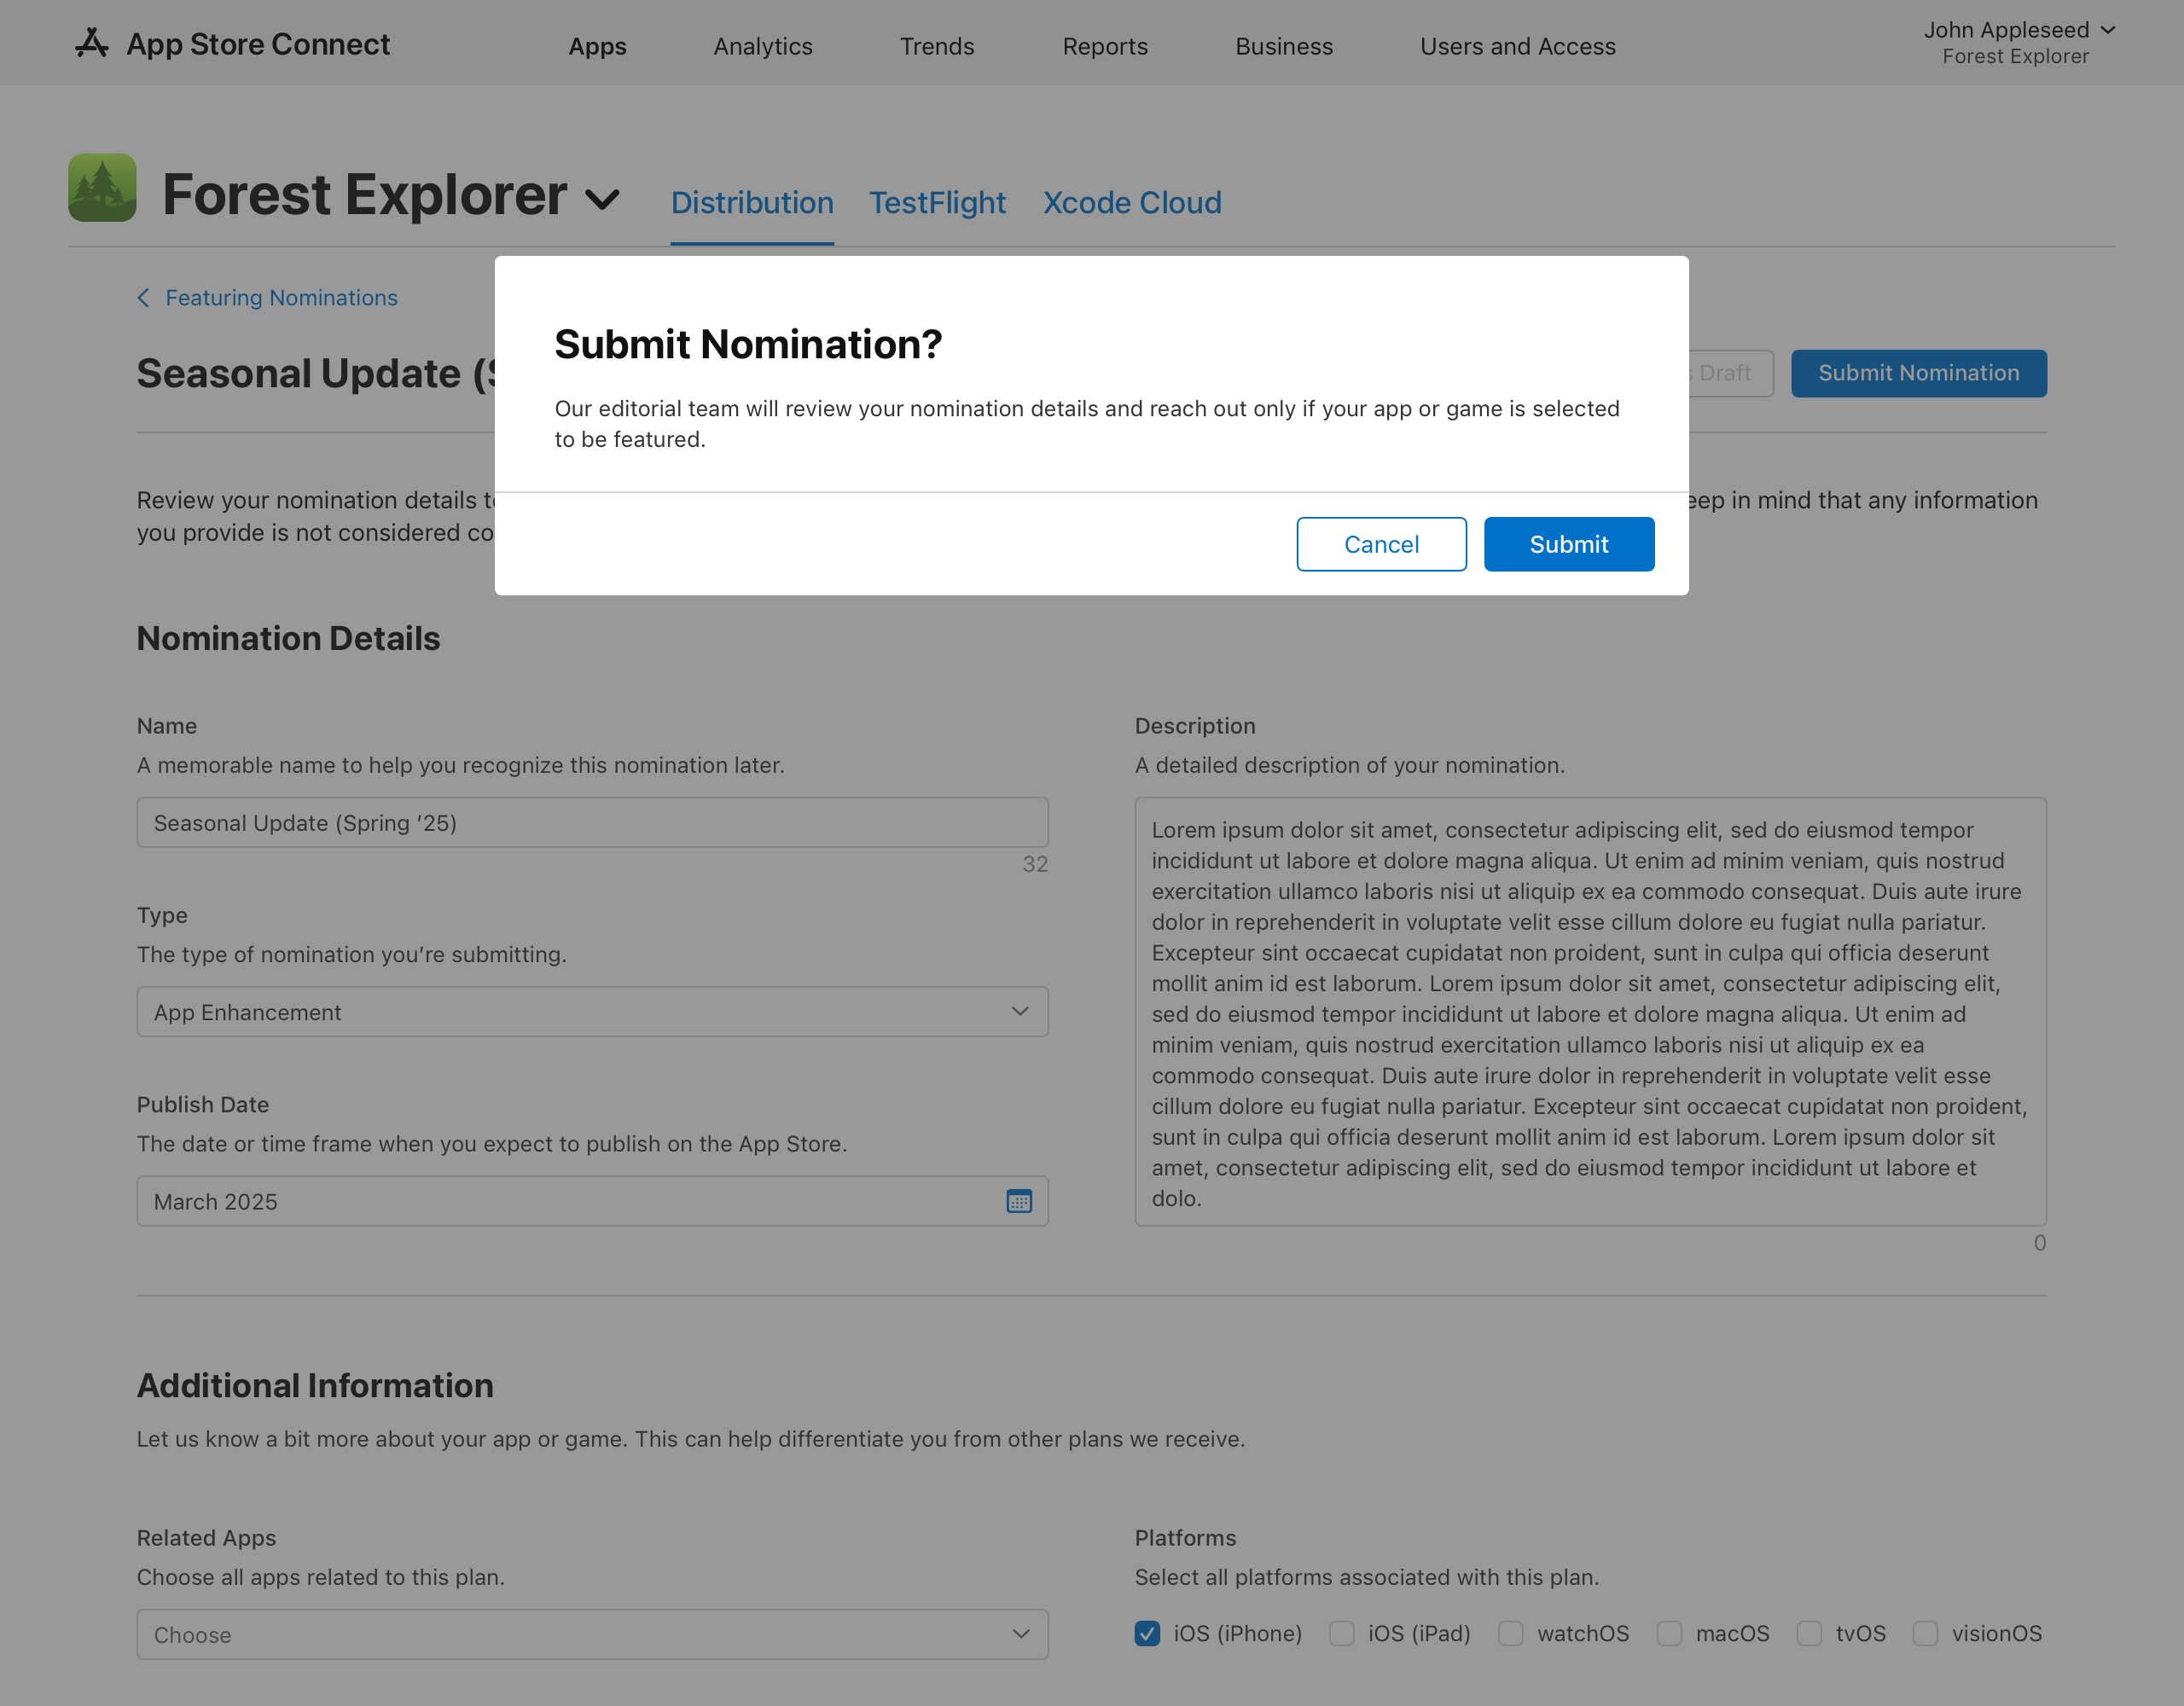
Once you're ready to submit, on the top right of the page, click Submit Nomination. In the dialog that appears, click Submit.
Once submitted, a green banner will confirm that your submission was successful. You can find the nomination under the Submitted section of the dashboard. To edit information for your drafts or submitted nominations, click on the nomination to view full details. Learn more on how to edit your nominations.
Import multiple nominations into App Store Connect
-
In Apps, select the app you want to view.
-
In the sidebar, under Featuring, click Nominations.
-
Click the “+” next to Nominations above the dashboard, then click Import Nominations.
Note: If it's your first time importing a nomination, click Get Started and in the dialog that appears, click Import Nominations.
-
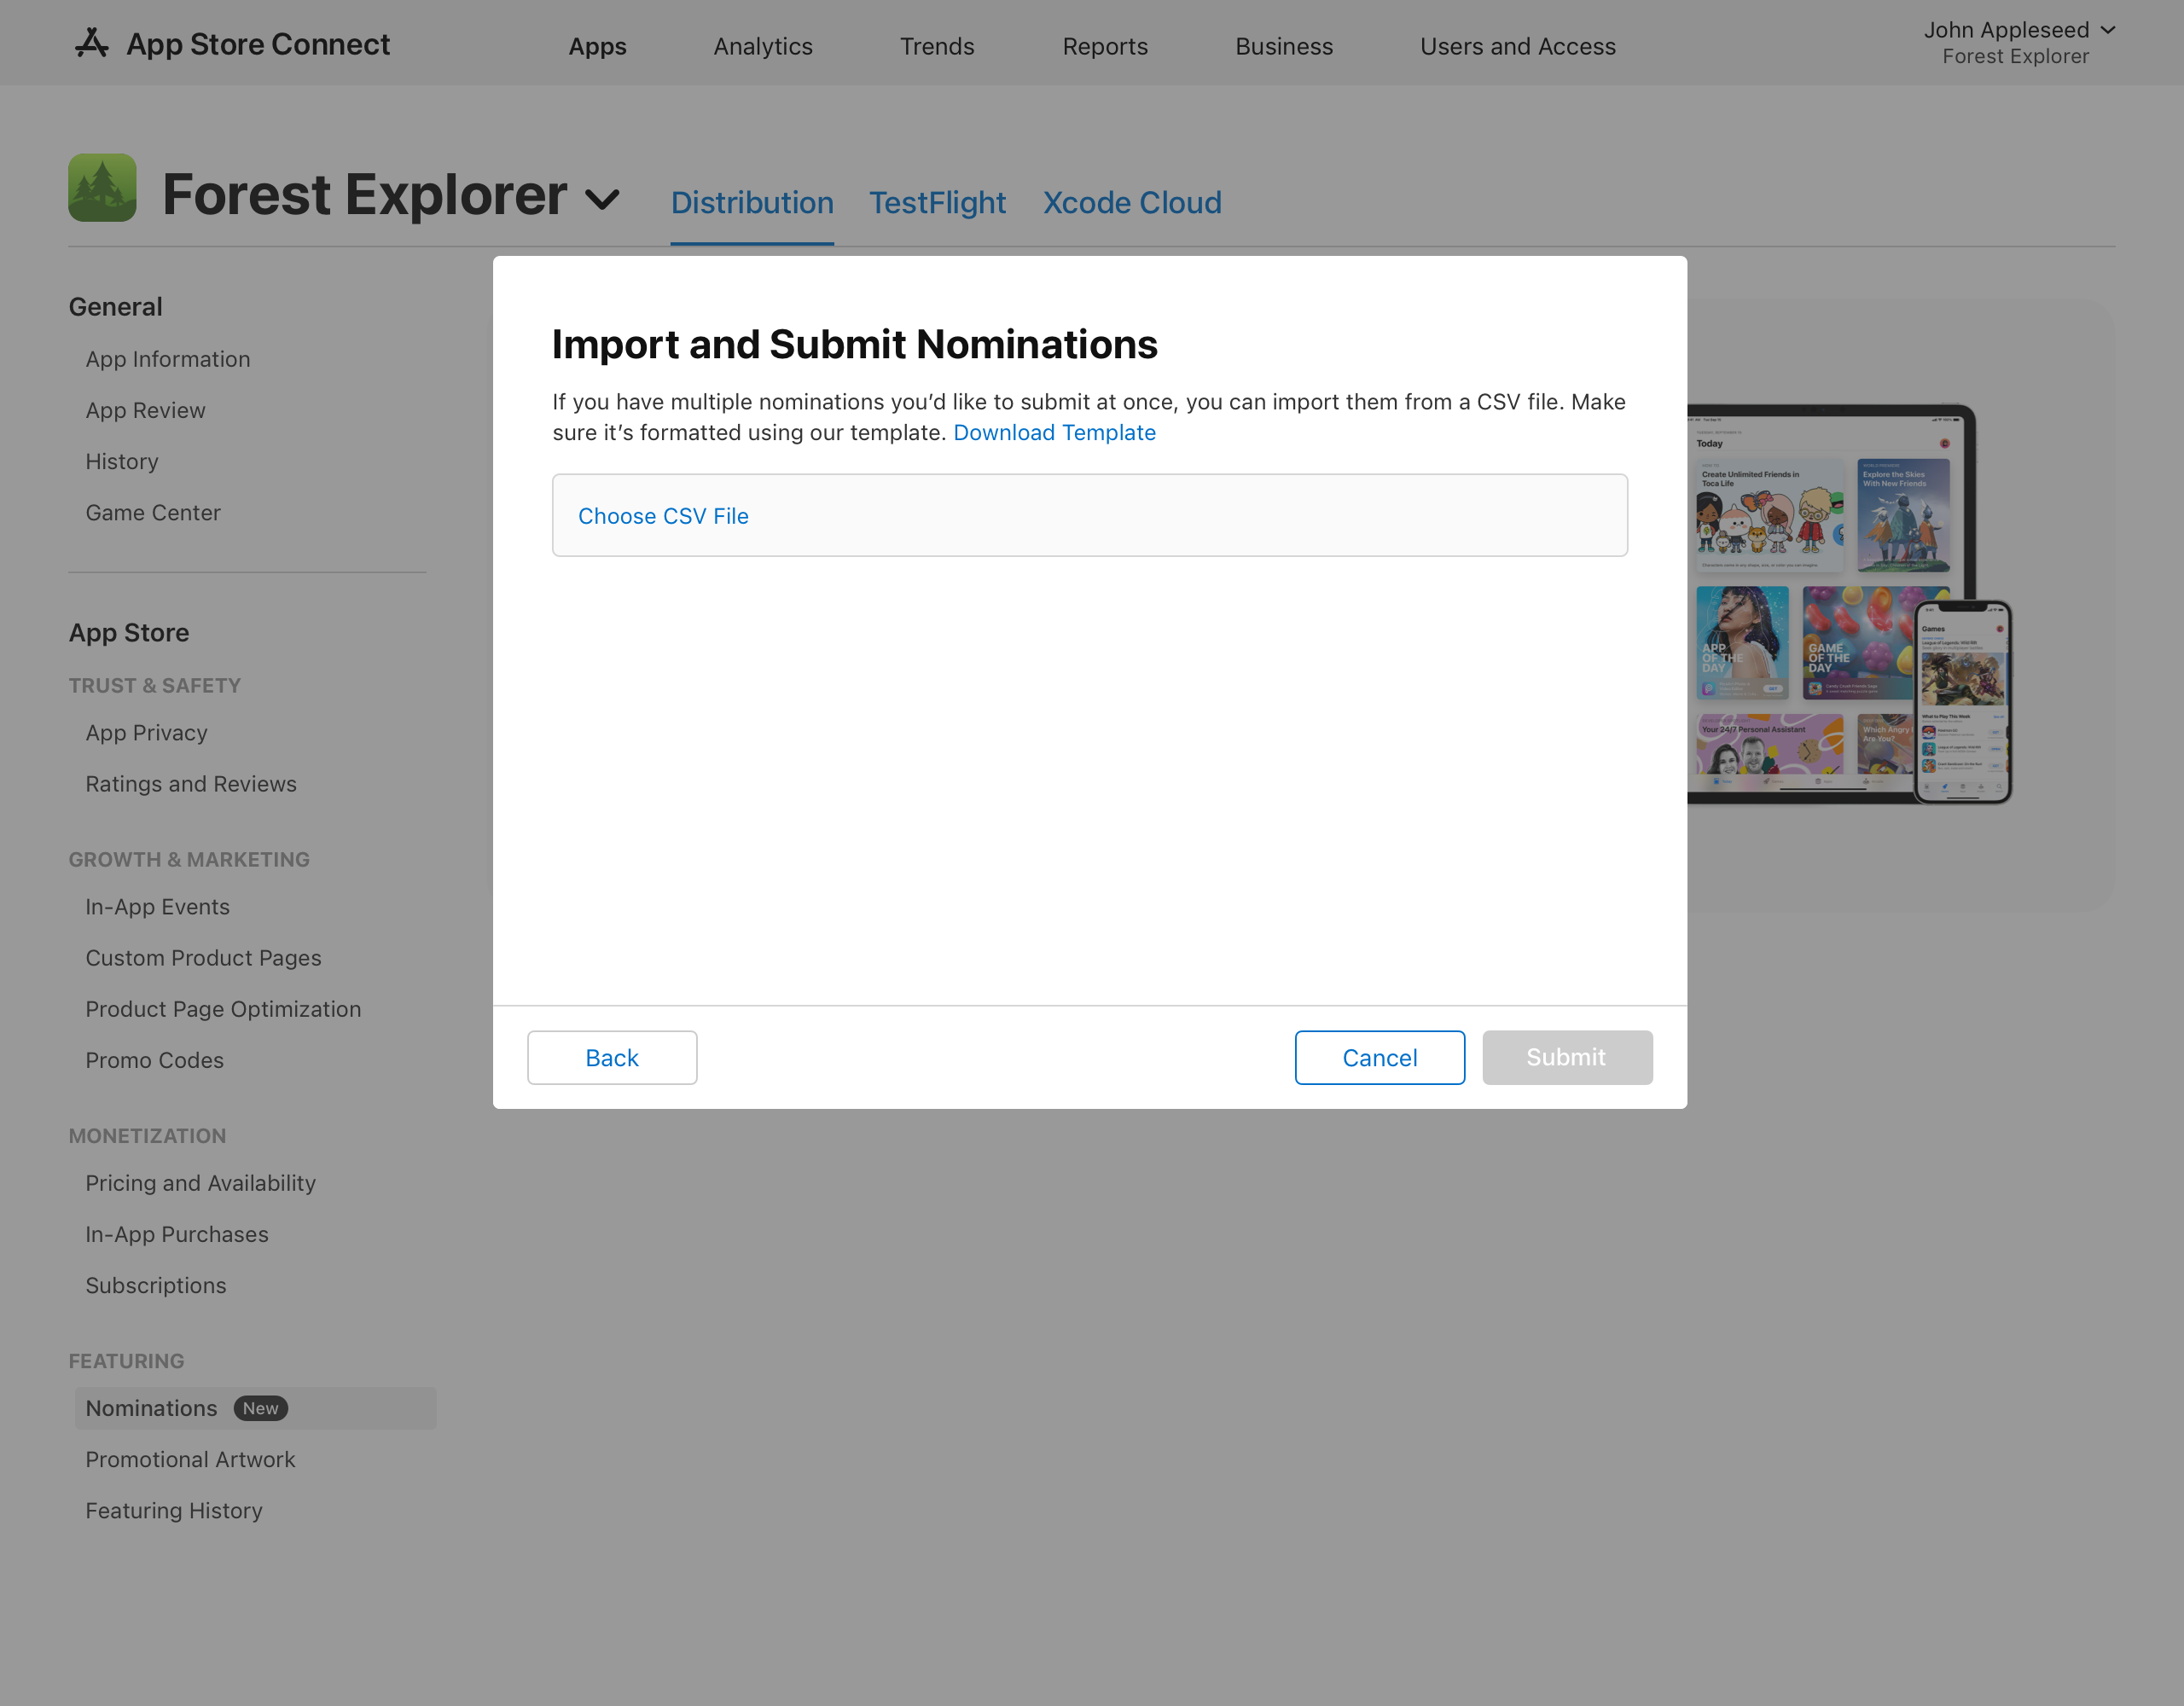
In the dialog that appears, click Download Template to download the CSV file template. Ensure that your file is formatted according to the provided template.
-
Once you have formatted and saved the nomination details to your computer, you can either drag and drop the CSV file or click Choose CSV File to select it. App Store Connect can then validate your nominations in your CSV file.
-
If validation is successful, you can proceed to submit your nominations by clicking Submit.
If there are validation errors, download the report, correct the CSV file based on the error details listed in the additional column, and then re-upload it. Once valid, nominations will be imported and display under the Submitted section of the dashboard.
Note: Nominations imported using a CSV file are automatically submitted upon upload. It's not possible to save these nominations as drafts. However, you may edit submitted nominations.
Once you complete the import and submission process, a green banner will appear to confirm success and display the number of entries submitted. You can view your nominations on the Featuring Nominations page in the dashboard under Submitted. Keep in mind each imported nomination will only be shown under Submitted for the apps it's related to.
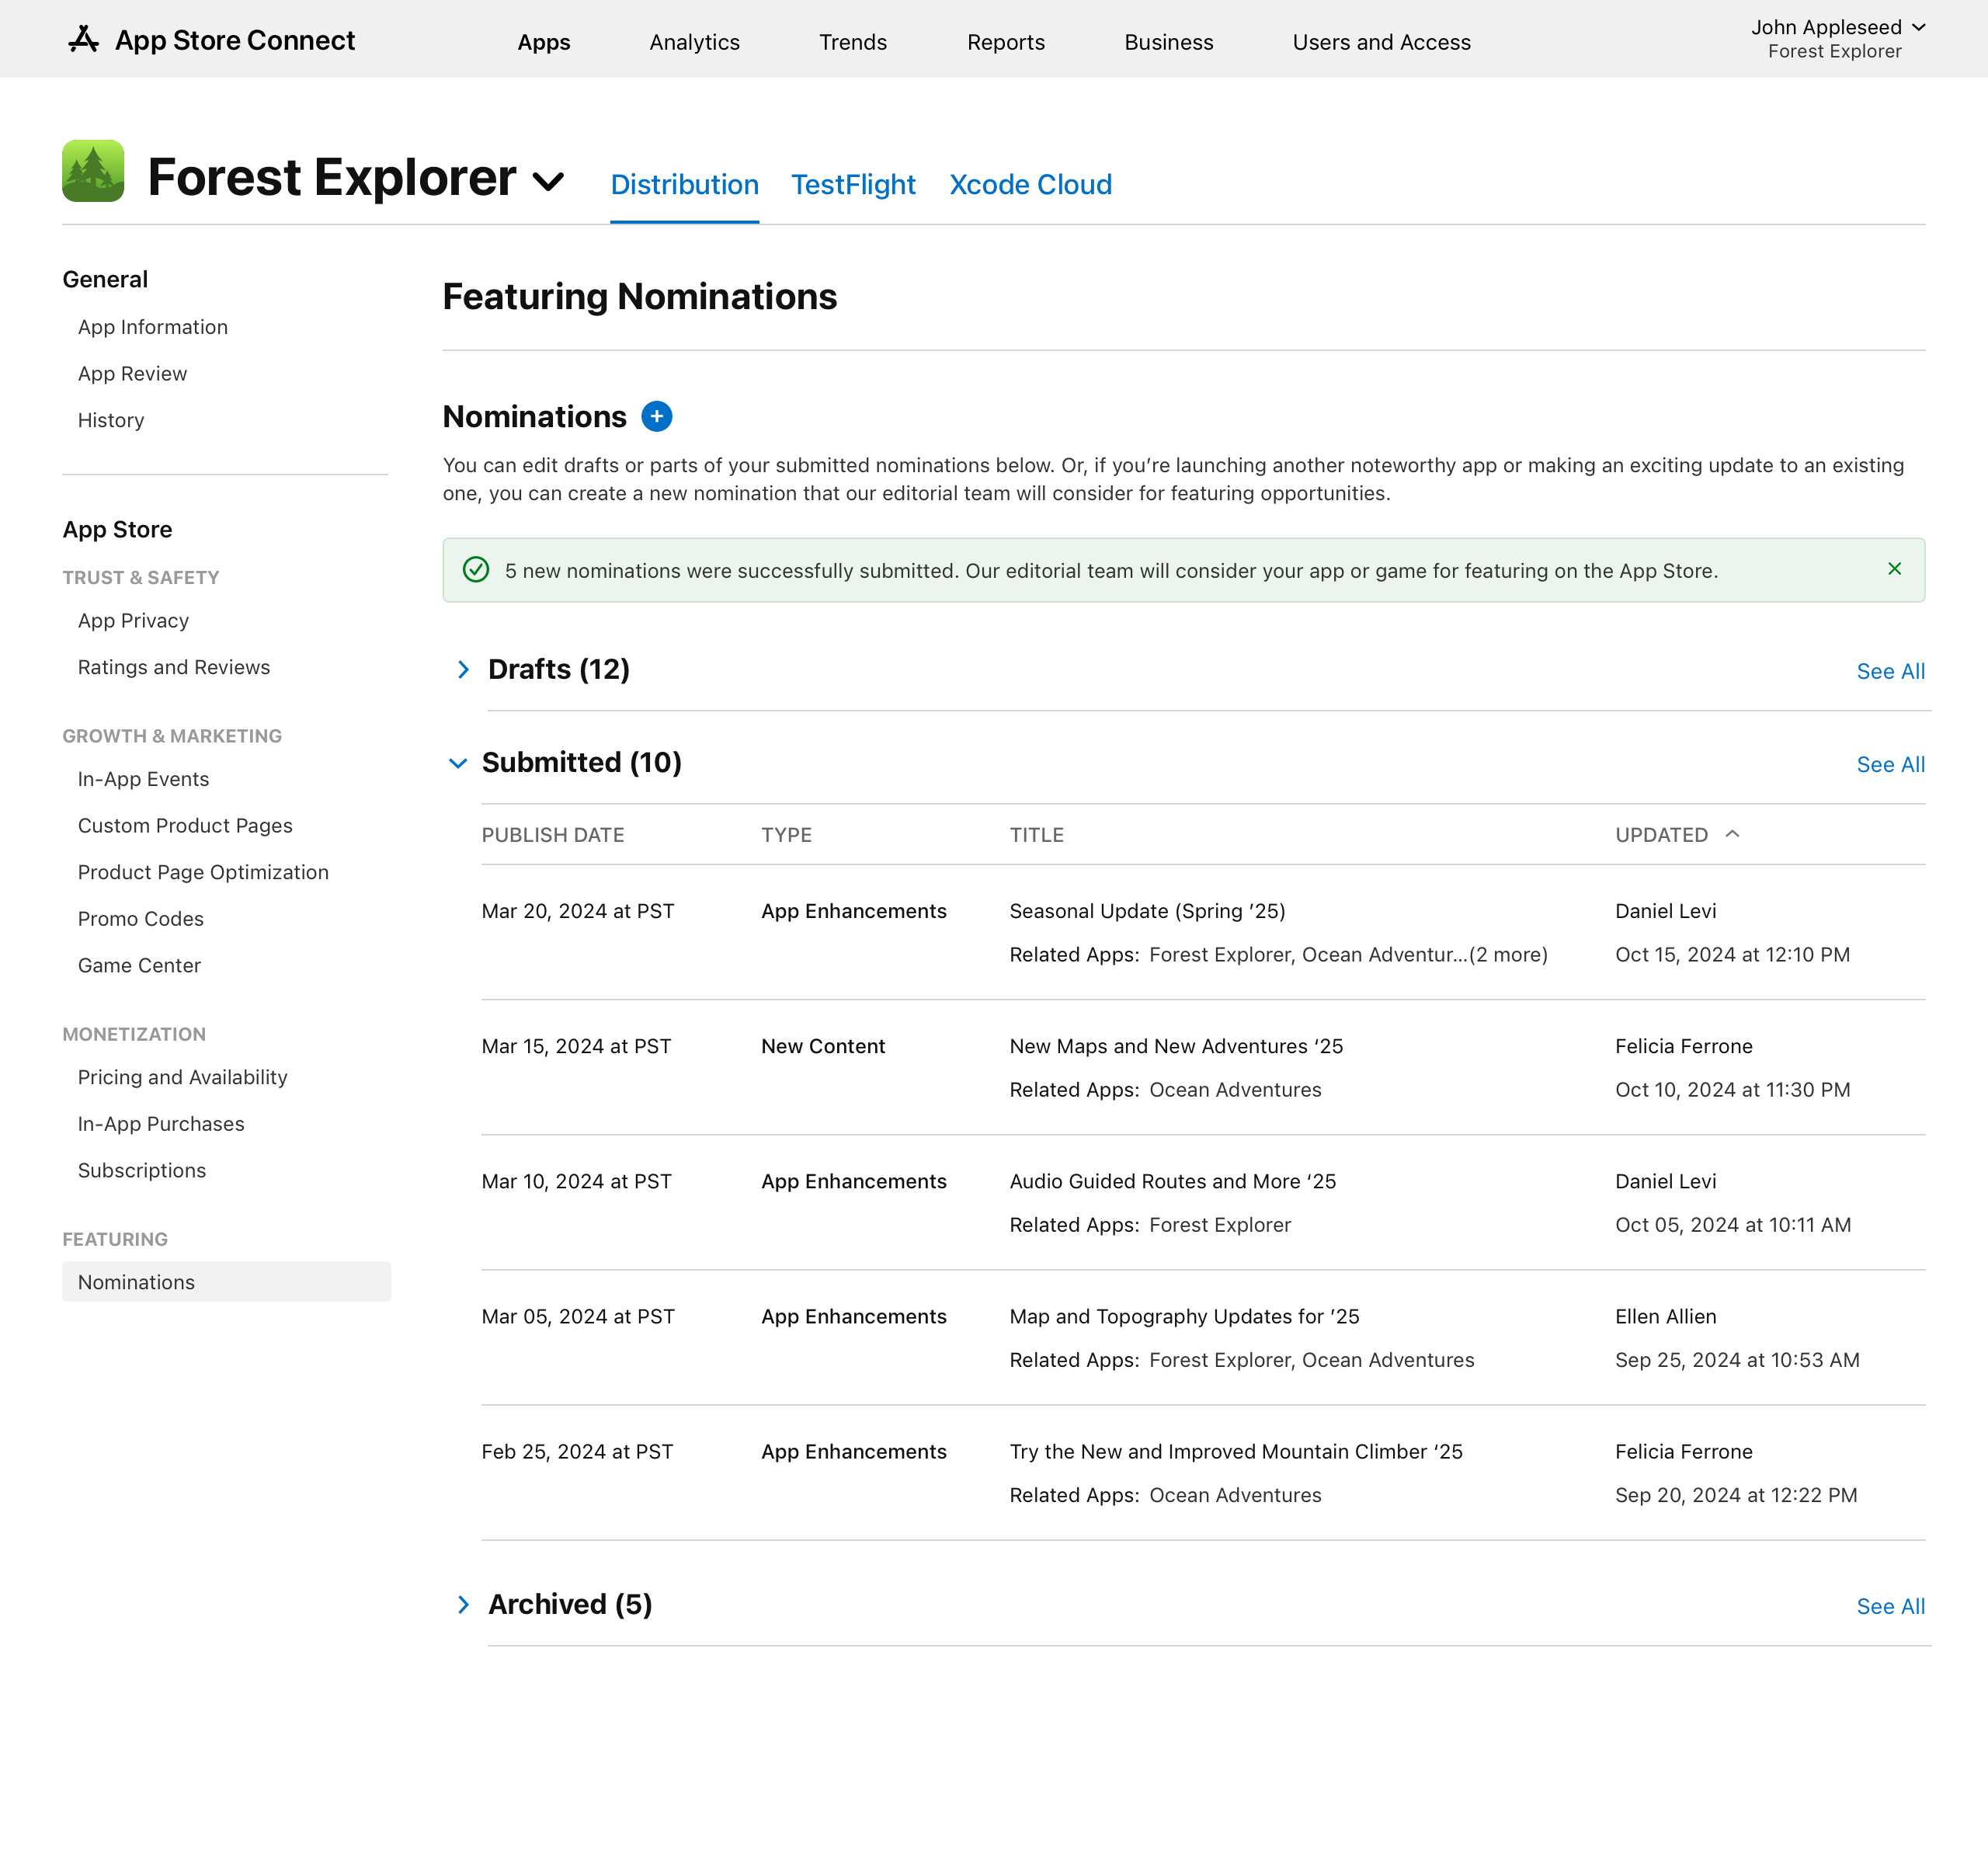
If you’d like to edit the information for your submitted nominations, click on the nomination to view the full details. Learn more on how to edit your nominations.
Manage Nominations
Explore nominations entries in the Featuring Nominations dashboard. This dashboard comprises three sections: Drafts, Submitted, and Archived. You can manage your nominations and update the details of your nominations within each section.
Export, duplicate, delete, or archive nominations
-
In Apps, select the app you want to view.
-
In the sidebar, under Featuring, click Nominations.
-
In the table, click the ellipsis (...) to the right of the nomination and then select the applicable action you'd like to take.
-
Export as CSV: Selecting this option downloads the nomination details as a CSV file to your computer.
-
Duplicate: Selecting this option will take you to the Nomination Details page, where you can modify the entry. The word “copy” will be appended to the name. The following information won't be copied over: Publish Date, Platforms, any plans for initial market launches, and Supplemental Materials.
-
Archive: Click Archive to confirm and proceed. Once a nomination has been archived, it can't be restored or edited, but it can be duplicated or exported.
-
Delete: Click Delete to confirm and proceed. Once deleted, the nomination no longer appears in App Store Connect. This action is permanent and can’t be undone. Keep in mind nominations in the Submitted section of the dashboard must be archived before they can be deleted.
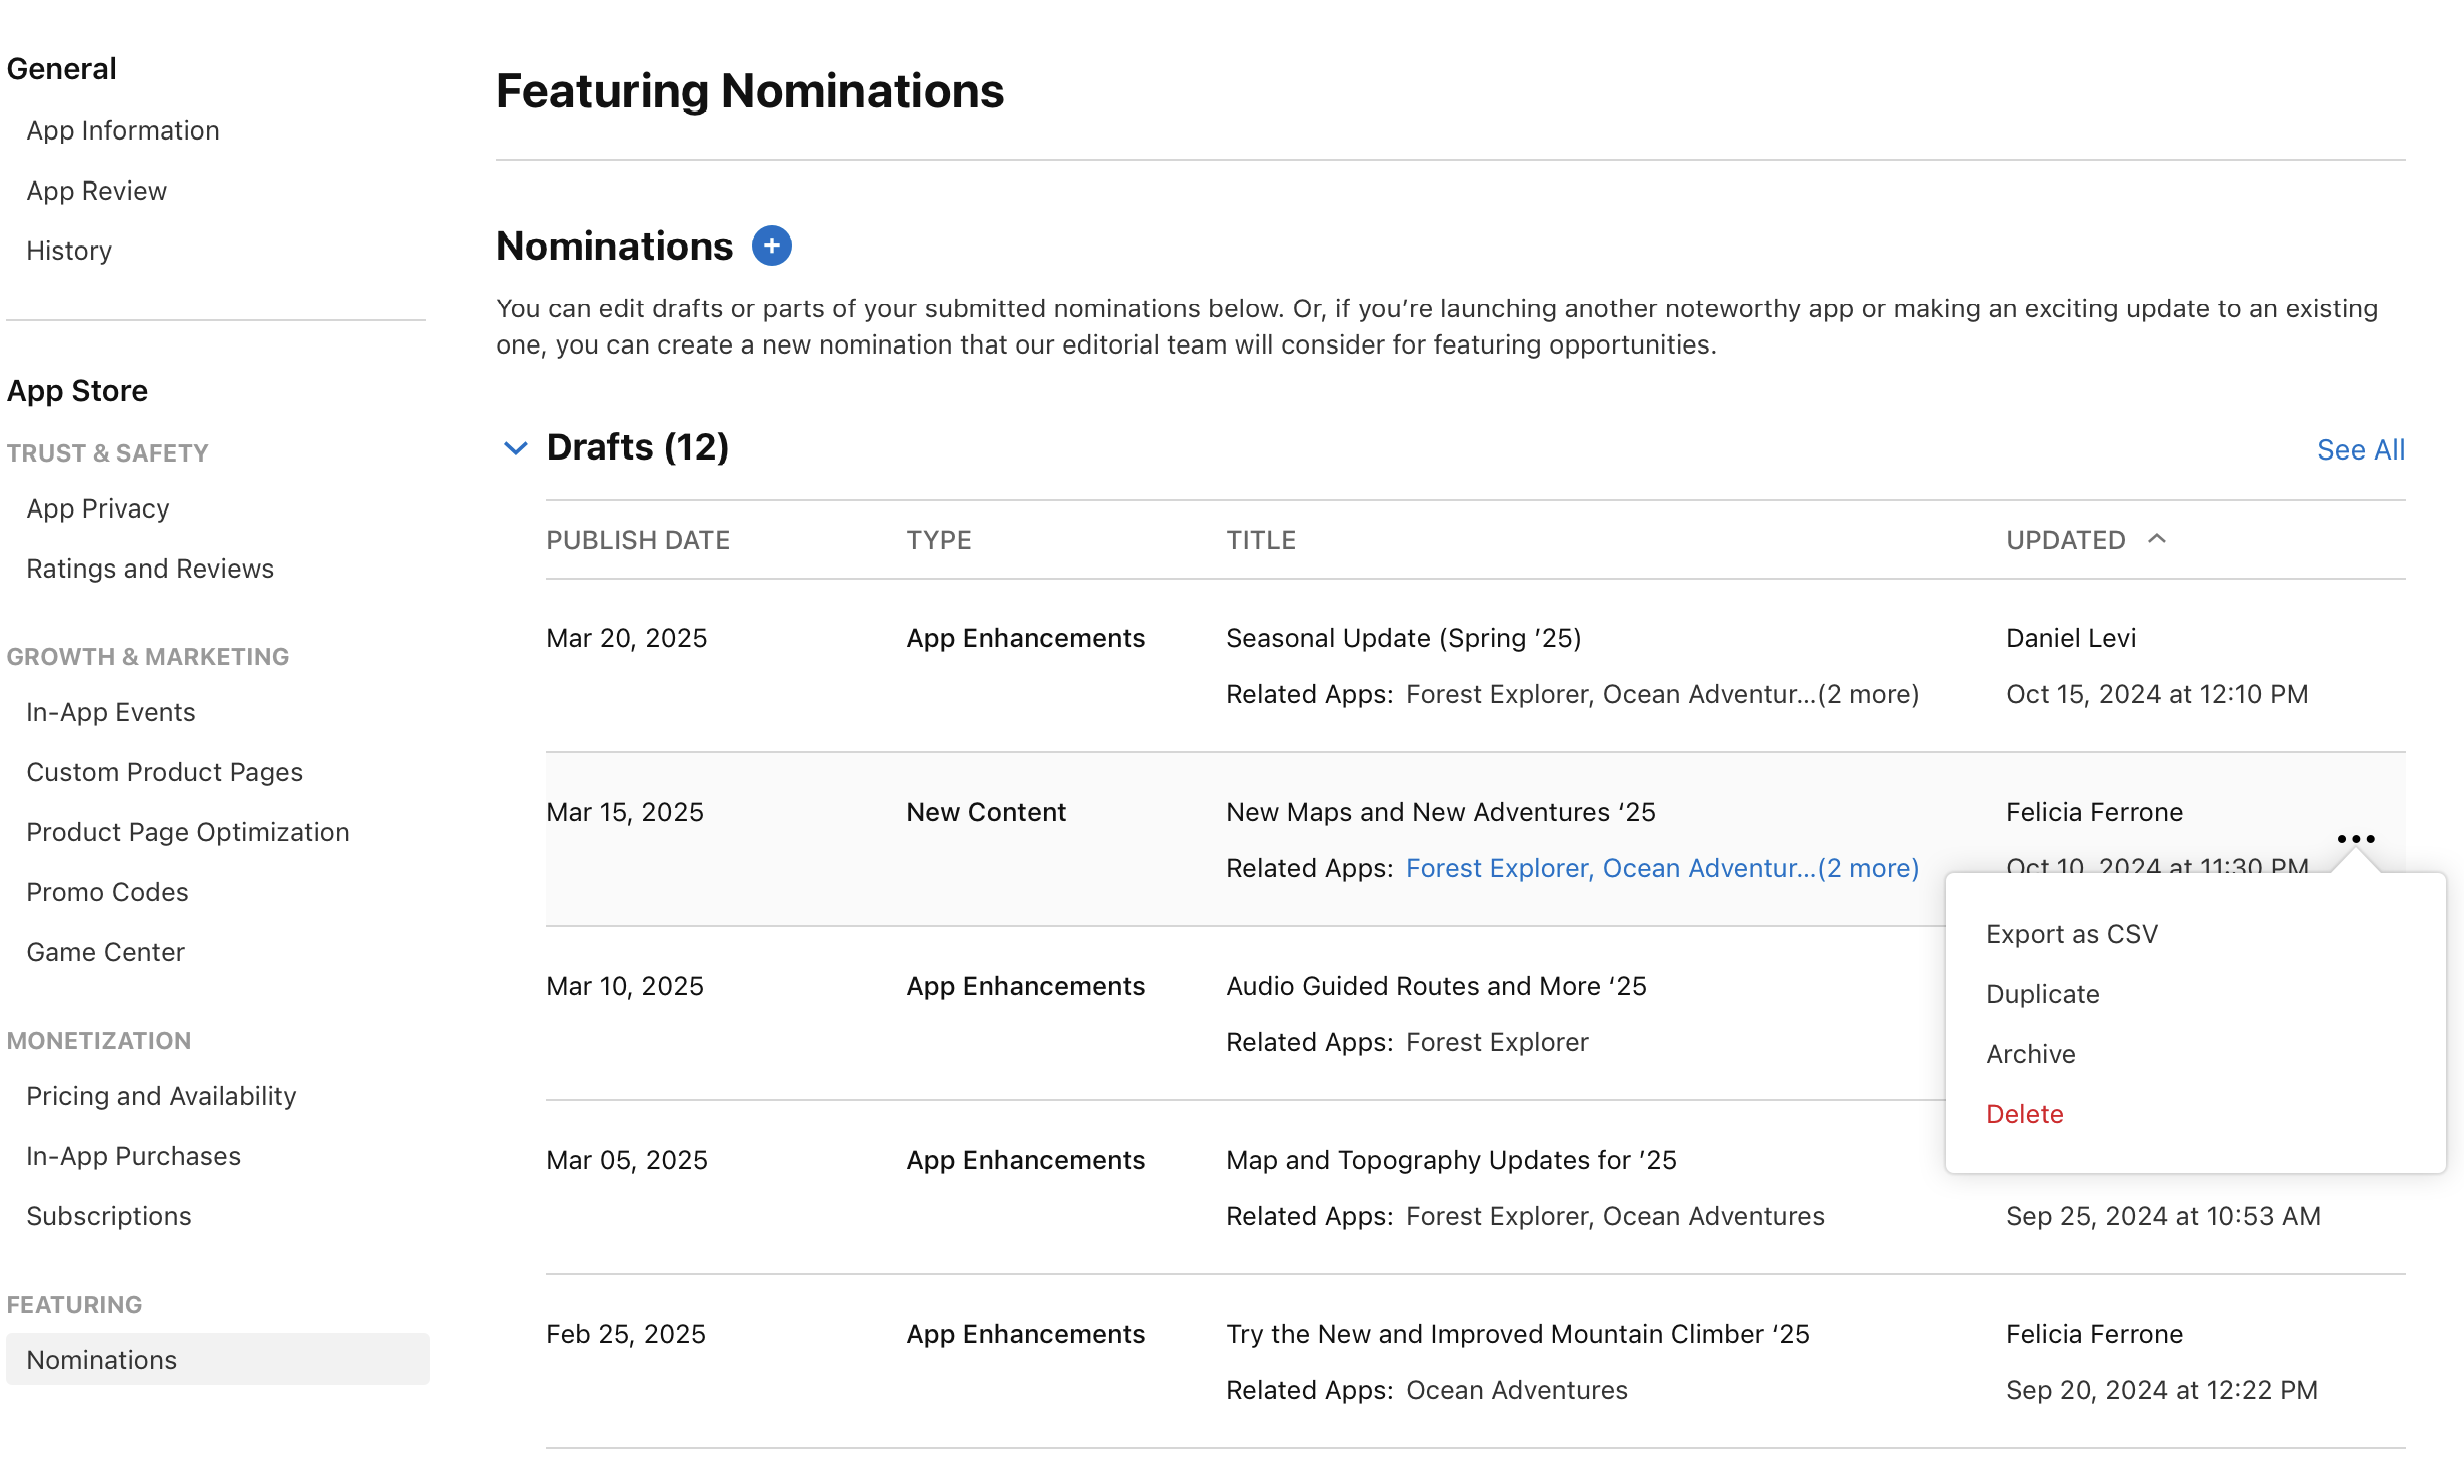 Tip: To bulk edit nominations in any section (Drafts, Submitted, Archived), click See All in the top right corner of the table, then select Edit. Choose the nominations you wish to modify, then select the applicable action from the top right corner. Confirm your selection in the dialog that appears.
-
Edit nominations information
Users with the appropriate roles can update all nominations, except those that are archived. You can edit all information fields for nominations in the draft state. However, once a nomination is submitted, you can’t change the nomination type or related applications.
-
In Apps, select the app you want to view.
-
In the sidebar, under Featuring, click Nominations.
-
To view all the details for a nomination entry, under the Drafts or Submitted sections, click on the nomination you'd like to update.
-
After you have made your updates, click Submit Nomination.
If you're not ready to submit, click Save as Draft at the top of the page to save your progress. The nomination is then be moved to the Drafts section for future editing.
A green banner will appear informing you that your submission was successful, and you will find the updated nomination under the Submitted section of the dashboard.
Tip: To update or edit multiple nominations at once, click See All in the top right corner of the table, then select Edit. Choose the nominations you want to modify, then click Export CSV from the top right corner of the table. This will compile all selected nominations into a single CSV file, which you can update and then import to App Store Connect.