App Store Connect Help
App Store Connect Test a beta version Invite external testers
Invite external testers
External testers are people you invite to test your app who aren’t App Store Connect users. After uploading your build, you can invite up to 10,000 external testers per app. To make your build available for external testing, you need to create an external group, add builds, and invite testers using their email addresses or by sharing a public invitation link.
When inviting testers via a public link, you can set tester criteria, such as device and OS requirements, ensuring only qualified testers can accept the invitation. This facilitates the enrollment of relevant testers, who can then provide feedback for your beta app. Learn how to set tester criteria when inviting testers using a public link.
Keep in mind that:
-
To create an external group for external testing, you must first create an internal group for internal testing.
-
Builds uploaded as TestFlight Internal Only from Xcode or Xcode Cloud are marked as internal under the build number and can only be added to internal tester groups.
-
Managed Apple Accounts created in reserved domains can’t be used to test builds. Learn more about reserved domains in Apple School Manager, Apple Business Manager, or Apple Business Essentials.
Learn how to manage tester invitations with the App Store Connect API.
Required role: Account Holder, Admin, or App Manager. View role permissions.
Create a group
-
In Apps, select the app you want to view.
-
Click the TestFlight tab.
-
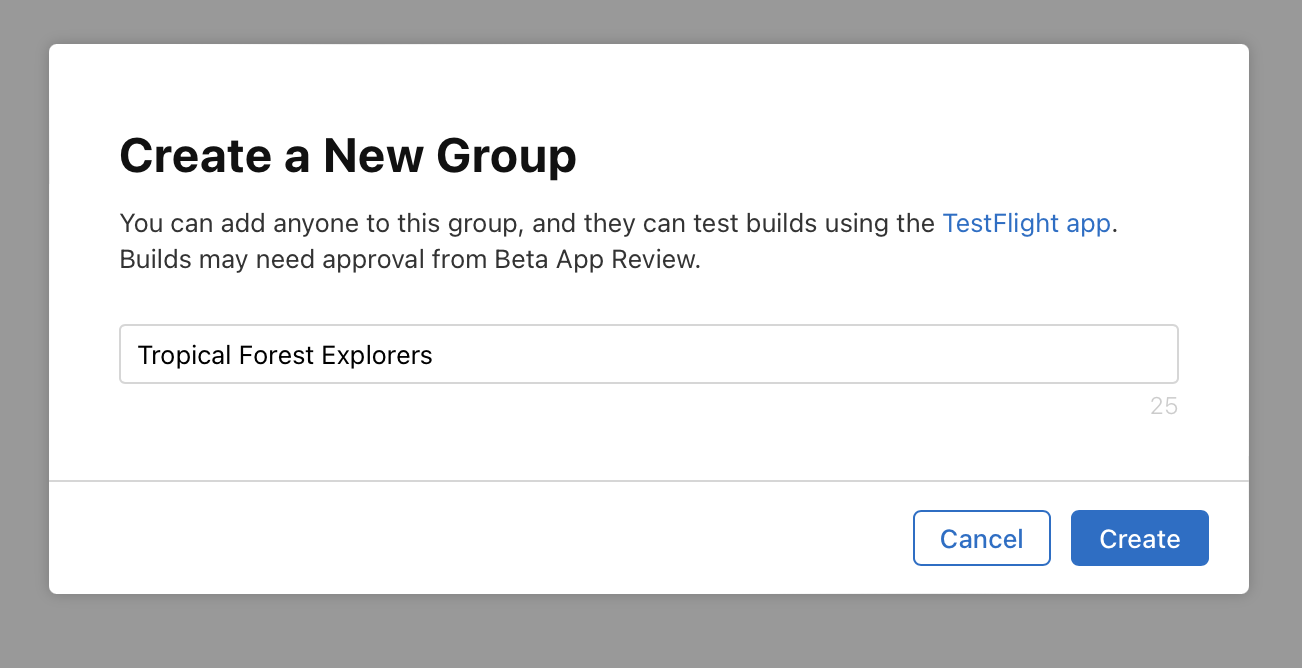
In the sidebar, click the add button (+) next to External Testing to add a new group.
-
In the dialog that appears, enter a group name, then click Create.
Later, you can change the name of the group if needed.

Add builds to a group
-
In Apps, select the app you want to view.
-
Click the TestFlight tab.
-
In the sidebar, under External Testing, select the group to which you want to add builds.
-
On the right, click Add Builds to choose which builds you want to add to this group.
Note: If you plan to invite testers using a public link and set criteria, ensure that the builds you add to the group are compatible with the criteria you’ve set. You can review the insight cards at the top of the group's details page to check for any incompatible builds that have been added.

Note: You can add only one build at a time, but you can add more later. To add additional builds to a group, click the add button (+) next to Builds on the tester group page.
-
In the build dialog, select the platform and version from the pop-up menus.
-
In the table, select a build, then click Add.
-
In the What to Test dialog, enter what you want testers to focus on.
-
Optionally, enter localized versions of testing information in the text fields under each language-specific section.
-
Optionally, select "Automatically notify testers."
If you leave this checkbox deselected, you must manually distribute the build to testers after it's approved by TestFlight App Review.
-
Depending on the build's status, click either Submit Review or Start Testing.
You can only have one build of each version in review at a time. Once that build is approved, you can submit additional builds.
If your build uses Apple-hosted asset packs, make sure to submit the latest versions of any asset packs needed for testing after submitting the build.
Note: You can submit up to six builds for TestFlight App Review within a 24-hour period.
After you submit your build to TestFlight App Review, Apple reviews the build and its accompanying metadata. The first build you submit requires a full review, but later builds for the same version might not.
If Apple approves your build for TestFlight beta testing, users on the App Store Connect account with the Admin role will receive an email notifying them of the approval.
If Apple rejects your build or metadata, the status of the build will be Rejected. You can click App Review from the sidebar under General to view the rejection details for your beta build.
Note: Enter test information, such as Feedback Email and Contact Information, if these details haven’t been provided in the Test information dialog.
Invite external testers using a public link or email
Once you have builds available to test, and you've added them to a group, you can invite testers. You can Invite testers using a public link, email, or both. When inviting testers using a public link, you can set tester criteria.
Invite testers using a public link
-
In Apps, select the app you want to view.
-
Click the TestFlight tab.
-
In the sidebar, under External Testing, select a group.
-
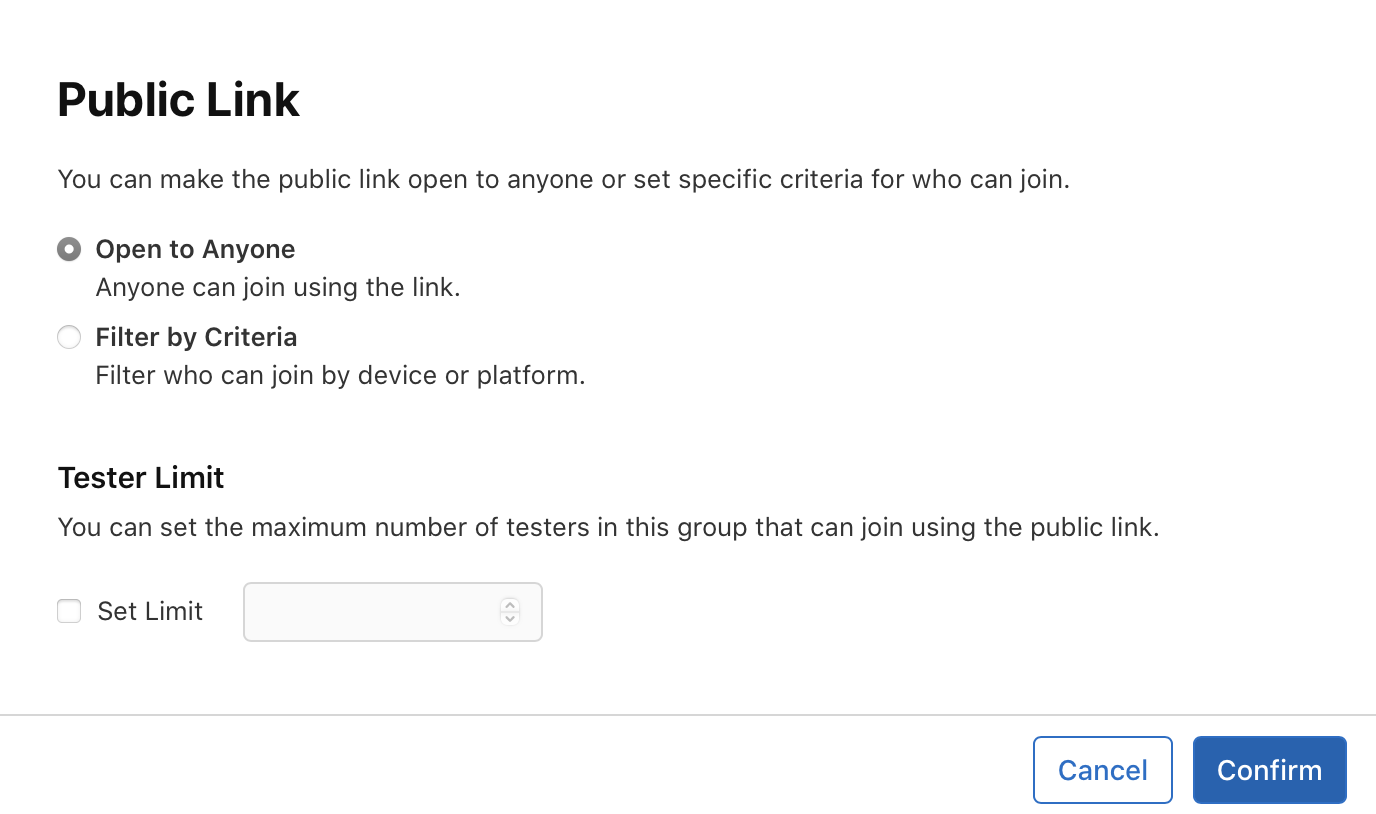
Under the testers tab, click Create Public Link.

-
In the dialog that appears, select either Open to Anyone or Filter by Criteria.
-
Open to Anyone. Anyone can join using the link.
-
Filter by Criteria. Filter who can join by device or platform.
Optionally, under Tester Limit, click Set Limit to limit the number of testers who can join this testing group using the public link. Enter a number between 1 and 10,000.

-
-
If you select Open to Anyone, click Confirm, then copy the link and share it using social media, messages, email, or other channels.
If you select Filter by Criteria, click Next, and then follow the steps below.
-
In the dialog that appears, click Add Criteria. You need to add at least one criteria to invite testers.
-
In the drop-down menu, select the device you want to add criteria for, then select the OS details. You can add multiple criteria as needed.
-
From. Only allow testers using the OS version in the specified range to test your app.
-
Newer than or equal to. Only allow testers using the specified OS version or newer to test your app.
-
Older than or equal to. Only allow testers using the specified OS version or older to test your app.
-
All supported (for platform). Allow testers with any OS version for the selected platform to test your app.
-
-
After adding all your criteria, click Confirm. Then, copy the link and share it on social media, messaging apps, email, or any other channel.
Once you have created your public link, you can add or edit criteria, set or change a tester limit, make the link available to everyone, or disable it. Click Manage next to Public Link to open the dialog, make your changes, and then click Save.
![]() Tip: Check the insight cards at the top of the group details page to identify if there are no compatible builds, if the public link is full, or if a build is about to expire.
Tip: Check the insight cards at the top of the group details page to identify if there are no compatible builds, if the public link is full, or if a build is about to expire.
View public link metrics to evaluate its performance and review feedback testers may have provided.
Keep in mind that anyone can share this link, so testers could potentially join your testing group even if you do not invite them directly.
If a tester joins your group using a public link, their name and email won’t be displayed in the Testers section in App Store Connect—it will display as anonymous. However, their installation date, sessions, and crashes will be displayed. You can make the public link deactivate at any time.
Invite testers using their email address
-
In Apps, select the app you want to view.
-
Click the TestFlight tab.
-
In the sidebar, under External Testing, select a group.
-
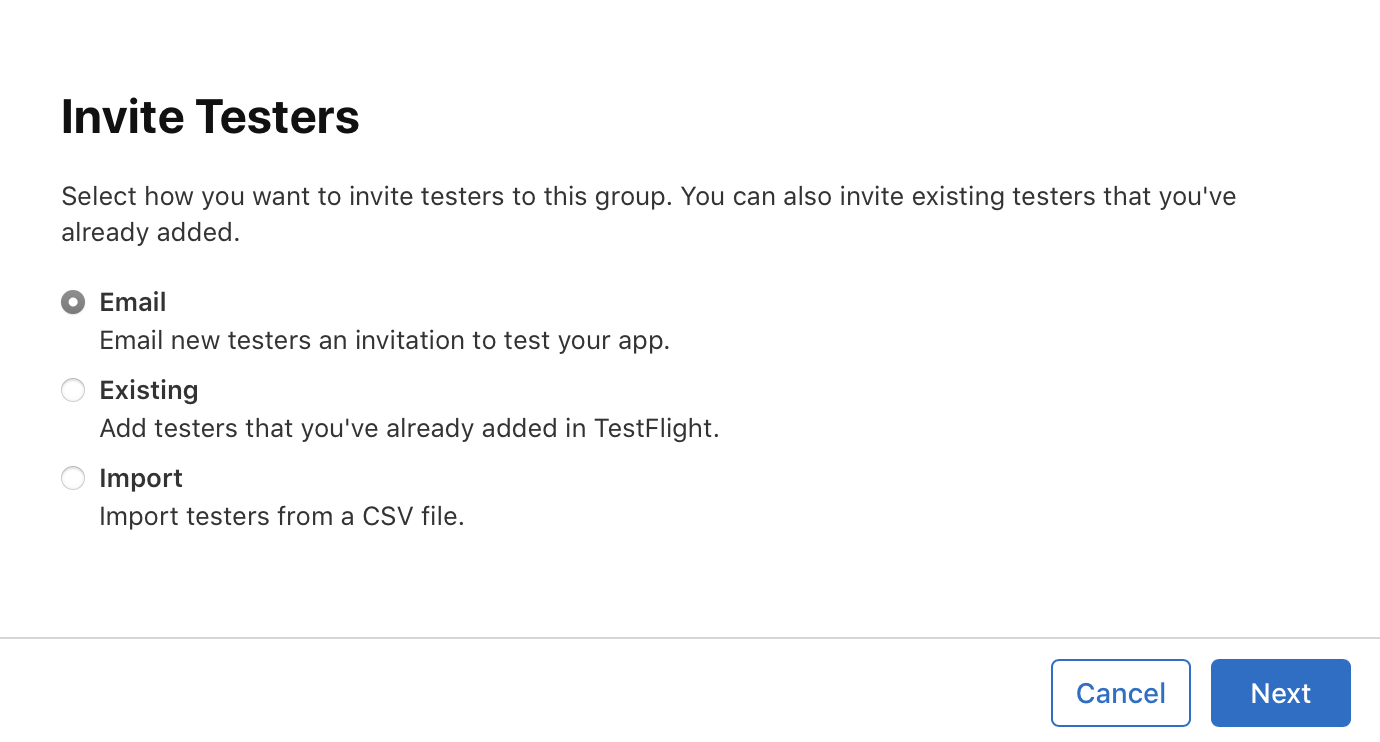
Click the add button (+) next to Testers.
-
In the pop-up menu that appears, choose an option. You can add new testers using their email address, existing testers you've previously added, or import testers from a CSV file.

When you invite testers, they will receive an invitation email to begin testing. If a tester accepts an email invitation, their name, email address, installation date, sessions, and crashes, will display in the Testers section in App Store Connect.
![]() Tip: To add users with a specific device type to a group, click Add Filter and select devices to filter by. Select all testers using the checkbox at the top of the table or select testers individually, then click Add to Group. In the dialog that appears, select the eligible groups you want to add these testers to and click Add.
Tip: To add users with a specific device type to a group, click Add Filter and select devices to filter by. Select all testers using the checkbox at the top of the table or select testers individually, then click Add to Group. In the dialog that appears, select the eligible groups you want to add these testers to and click Add.
Notify external testers after your build is approved
If you didn’t select “Automatically notify testers” when you added your build to your group, you must manually notify testers once your build is approved.
-
In Apps, select the app you want to view.
-
Click the TestFlight tab.
-
In the sidebar, under Builds, click the platform for your app.
-
Choose a version, then under Status, click Notify Testers for the build row.
The build status changes to Testing. External testers will then receive a notification directing them to accept the invitation using the TestFlight app on their device.
Remove a build from a group
-
In Apps, select the app you want to view.
-
Click the TestFlight tab.
-
In the sidebar, under External Testing, select a group.
-
On the right, under Builds, hold the pointer over the build you want to remove.
-
Click the delete button.
-
In the dialog that appears, confirm you want to remove the build from the group and click Remove.
If you want to remove a build from testing for all your testers, go to Stop testing a build.
FAQs
How do I appeal if my beta build was rejected?
To appeal your beta build being rejected, contact TestFlight App Review.